July/August 2023 Newsletter
|
|
|
Monthly Membership Meeting
September 6 7:30pm to 8:30pm
7pm for social and goofing off
****
Leesburg Workday TBD 9am - 2pm
check the white board in the main room for additional tasks
Purcellville Workday September 2 9am - 2pm
There's something for everyone - get those volunteer hours in!
****
New Member Orientation
Dates TBDOnline 6:30 - 8:00pm
In Person MS-L 6:00-7:30 pm
register online, event link will be sent to all registrants
**** Monthly Social MSP September 17 4pm-7pm MSL September 24 4pm-7pm themes TBD |
|
|
|
|
Your email provider may be truncating your newsletter. Be sure to click "View Entire Message" if it says [Message clipped] at the bottom of your email- there's good stuff all the way to the end!
|
|
|
|
|
Makersmiths Education Initiatives
Diane Painter
Miniature Halloween House Contest Lucy Foxworth from Paper, Glitter, Glue
Paper, Glitter, Glue will again offer a Miniature Halloween House Contest. This is an opportunity to involve family members, especially your children, to exercise creative and making skills and learn technology skills such as how to use a Cricut machine! The contest rules are found here. If interested in getting started, especially how to find miniature house patterns and how to use a Cricut machine, contact diane.painter@makersmiths.org She will be happy to meet with you at MSL or MSP to learn to use the Cricut machines, conveniently located at both sites. Even if you do not want to enter the 2023 contest, it would be fun to learn to make a card stock house and apply the skills later on such as making Thanksgiving centerpiece items, a winter holiday scene, holiday cards, and more!
|
|
|
Volunteer Opportunities!
|
- When: October 7th, 2023
- Where: Sterling Community Center
- What we need: Volunteers to set up, breakdown, and staff the booth!
- Who to contact: If you are interested in volunteering, please get in touch with Mark Millsap on slack
- CATOCTIN HARVEST FESTIVAL
- When: October 21st, 2023
- Where: Catoctin Elementary School
- What we need: Display pieces, mostly! Though if you want to help staff the booth, there may be a few spots available
- Who to contact: Mark Millsap on slack
- When: September 16th and 17th, 2023
- Where: Snickersville Tpke, Bluemont
- What we need: Staffing for the booth
- Who to contact: Ralph Pugh
- When: September 22nd and 23rd, 2023 (we'll only be participating on the 23rd, though!)
- Where: Lovettsville, VA
- What we need: An organizer!
- Who to contact: If you are interested in organizing/running the event on behalf of Makersmiths, please get in touch with Jason Gilligan (me)
- Deadline to find an organizer: August 30th! No organizer by then, no participation from Makersmiths unfortunately
- "But I want to volunteer to staff, not run it" Sit tight! I'll put out another announcement when we find an organizer.
- What: A four-day convention with a focus on music and gaming, with a dedicated makerspace we share with NovaLabs that hosts different projects. Other attractions include panels/classes, merch and art vendors, museums and galleries, concerts, arcades, etc. https://super.magfest.org/
- When: January 18-21, 2024 (10am to 10pm* but hours subject to change)
- Where: National Harbor, MD
- What we need: Volunteers! Convention passes will be provided, along with self-paid at a discount rooms at the Gaylord Resort
- Who to contact: Jason Gilligan (me)
|
|
|
|
|
|
|
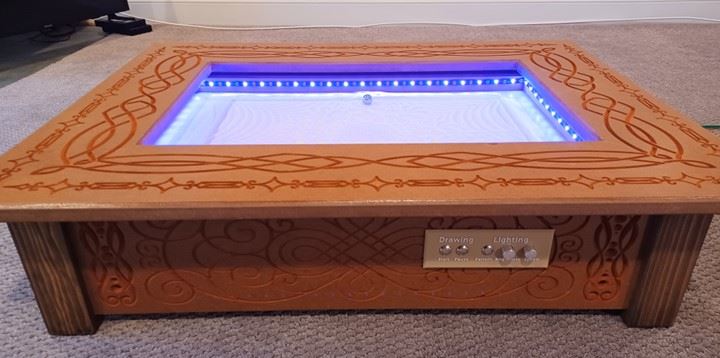
Kinetic Sand Art Table
Ralph Pugh
A metal ball rolls through a flat surface of sand to create decorative ripples and grooves just like a Japanese rock garden.
Under the glass top of the table sits a thin layer of sand in a sand tray. Under the sand tray, two stepper motors move a magnet along the X and Y axes very precisely along a predetermined path. This path, or series of paths are stored on a computer under the table.
On top of the table, the metal ball, pulled by the magnet, moves through the thin layer of sand to slowly create an ever changing series of geometrical patterns in the sand.
With a glass covering the complete top, it serves as a functional coffee table.
Sand tables exist commercially. https://sisyphus-industries.com/product/wood-table/
In the YouTube timelapse video, it shows the steel ball rolling through the sand to make and erase geometric images in the sand. https://www.youtube.com/watch?v=oxXi2cRQTB0
Links to the design
A YouTube video of a Sand Table design was found.
Both YouTube videos below from the sand table designer are quite long but describe in detail how to make the table.
Part 1 - https://www.youtube.com/watch?v=Lng_AsmfBfU
Part 2 - https://www.youtube.com/watch?v=GuPOcx9w6Vc
In the below link, the designer shows the steps involved in making the table.
https://www.instructables.com/Easily-Build-a-MACHINE-THAT-DESTROYS-WHAT-IT-CREAT/
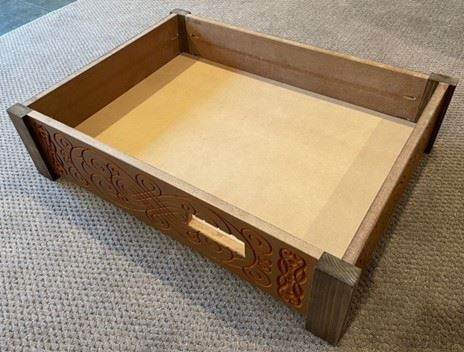
Making the Table Sides and Top
Cheap ¾” MDF wood from Home Depot was used. Cut the 4 sides of table 27 x 7 inches, 21 x 7 inches, using a table saw.
Sealed the outside surfaces with a sanding sealer, Then applied thin coats of shellac.
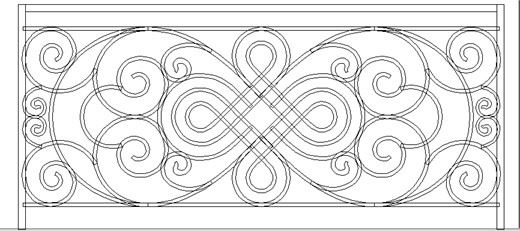
The MDF wood is very plain, wanted to apply some decorations based on a pattern downloaded from Shutterstock.
The image was from Shutterstock was for wrought iron work. The vectors had to be closed to allow VCarve software to calculate a toolpath for CNC profile engraving of the pattern. |
|
|
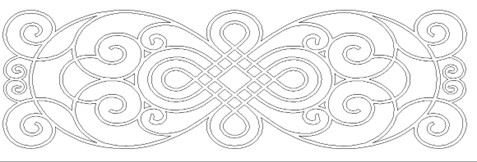
The original image consisted of many individual overlapping elements
|
|
|
The original image consisted of many individual overlapping elements |
|
|
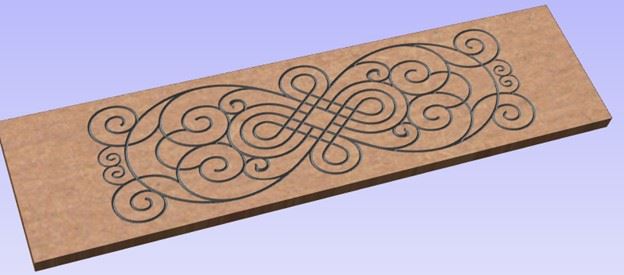
Created a toolpath in VCarve
software, ran the simulation of the toolpath to check for any errors before
cutting the actual MDF on the CNC machine at Makersmiths in Leesburg.
Simulation image of toolpath |
|
|
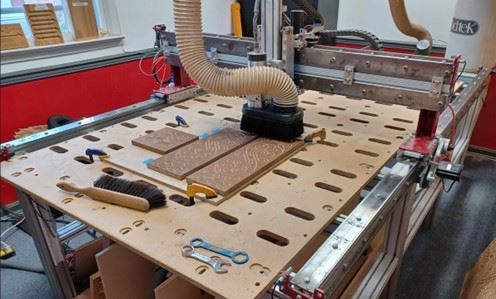
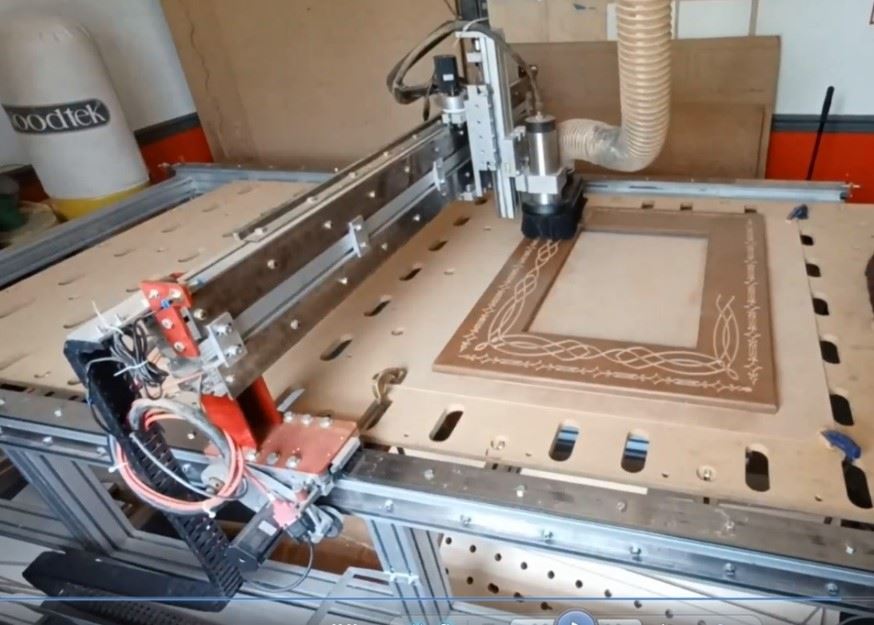
The small initial test piece and two sides of the table being engraved on the CNC machine at MS-L |
|
|
|
|
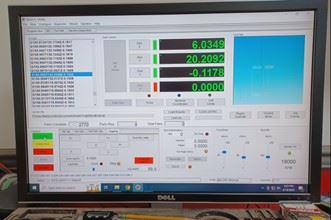
PC interface to the CNC machine
|
|
|
|
A more detailed view of the engraving pattern. |
|
|
|
|
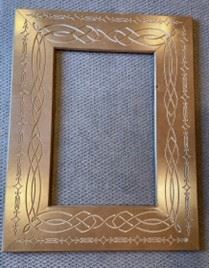
The same engraving method was repeated for the top, however
with a set of different patterns. The engraved patterns were then colored using a Terracotta
Indian ink pen.
|
|
|
|
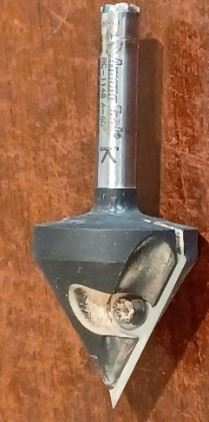
The engraving bit used was an Amana Tool RC-1148 60⁰,
¼” shank, V-Groove bit.
The ‘feeds and speeds’ data for this bit were imported into
the VCarve tool database. |
|
|
|
|
I used pocket screws to put the table sides together. The corner pieces were just cheap 2 x 4 lumber left over from another project. Those pieces were stained to show a little more of the grain pattern.
The bottom base was cut to size using ¾” thick MDF, fitted to the table using the 3D printed baseboard mounts (4). The table was made in 3 sections to make moving it around easier
(Short detachable table legs are still to be added). |
|
|
|
|
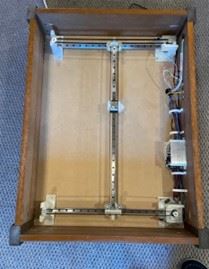
Table with gantry mechanism and computers |
|
|
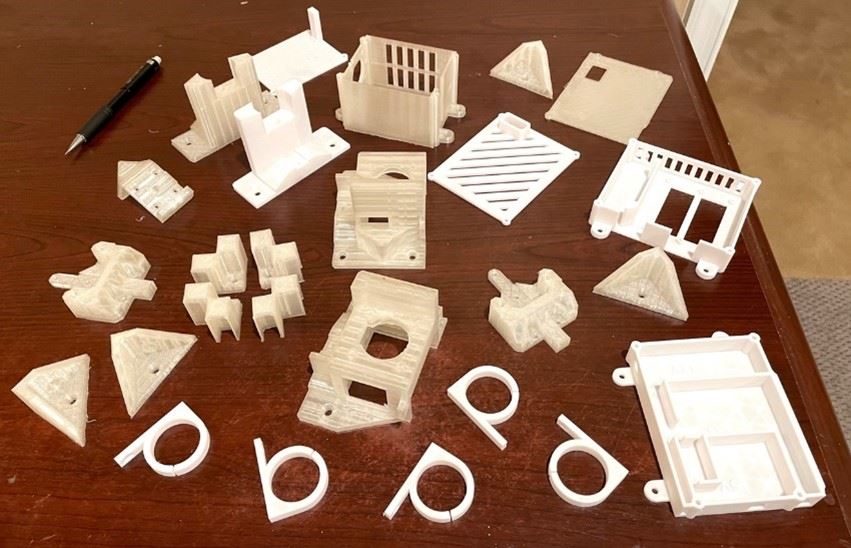
3D printed parts.
The table design incorporated many 3D printed parts.
All the
3D-printed parts were made at MS-L using the STL files from the designer. |
|
|
|
|
|
|
|
|
3D printer printing the control panel |
|
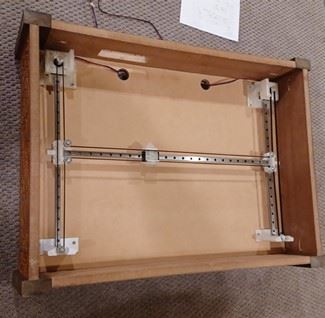
Initial assembly
The hardware parts were bought on Amazon based on a list provided by the sand table designer.
The below photo shows some of the hardware used in making the table gantry system and attaching it to the table.
the 2 Stepper motors into their 3D printed housings.
the Y axis and X axis slider rails.
the 3D printed magnet mount is shown in the middle.
the 8 idler wheels can be seen, along with the single connecting belt. |
|
|
|
|
When the left motor shaft was turned by hand clockwise, the movement of the belt would cause the magnet mount to move down and to the right.
Turning the right motor shaft clockwise, the magnet mount moved up and to the right.
An Arduino microcontroller was used to send the commands to the stepper motors. |
|
|
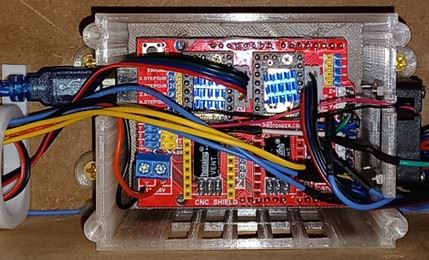
Arduino inside the 3D printed case. On top of the Arduino is the CNC Shield and the 2 Stepper Drivers.
Three lever type limit switches were glued to the motor housings. These switches are connected to the Arduino program to allow the machine (magnet mount) to be Home’d the to a known X and Y extreme travel positions.
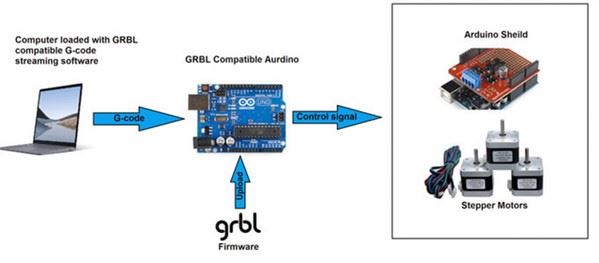
The Arduino program called GRBL was downloaded from GitHub.
https://github.com/DIY-Machines/Kinetic-Sand-Art-Table
GRBL is free open source software that guides the motion of a CNC machine, or in my case the sand table.
It takes G-codes as the input and translates them into electrical signal to the stepper motors.
Stepper motor driver circuits and the Arduino CNC shield are used as an interface to the motors.
The relative rotary motion of the 2 stepper motors provides the movement of the magnet holder. |
|
|
Once the Arduino was wired up and powered up, The command ‘$H’ to trigger the homing sequence was sent over the Serial Interface from the laptop.
The homing sequence moved the horizontal slider holding the magnet mount downwards until it contacts left and right side vertical travel limit switches. The magnet mount then moved to left to trigger the horizontal travel limit switch.
Manual move commands could then be tested.
G1 Y325 F2000 sends the magnet mount to the top left corner of the table.
G1 X520 F2000 sends the magnet mount to the top right corner of table.
G1 Y0 F2000 sends the magnet mount to the bottom right.
G1 means linear move, the X and Y values are the distances in millimeters for the move. F2000 is the speed.
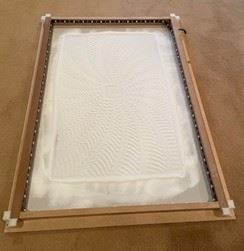
Sand tray construction.
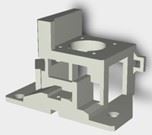
The sand tray was designed to sit on top of the previously installed 3D printed motor mounts (2) and the
Idle Supports (2). |
|
|
1/8” MDF was used for the sand tray base. Sized to be a loose fit 1/8” gap, inside the table base.
Photo on Page 4 shows the rectangular MDF rim around the base, held in place using the 3D printed. This rim was the framing for the LED lights. The rim was held place using the 4 3D printed corner pieces.
The addressable RGB LED strip was threaded around the inside of the rim to provide light across the surface of the sand. This would enhance the appearance of the sand pattern.
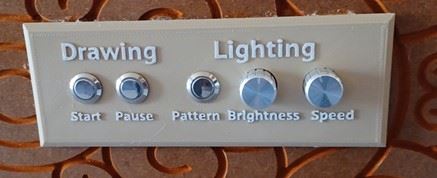
The LED color, color pattern selection, brightness and pattern speed control were performed by a program running in a 2nd Arduino computer located under the table. The program was downloaded from GitHub.
The 3D printed control panel holds the pushbutton and potentiometers that are connected as inputs to this Arduino. |
|
|
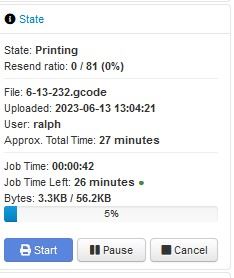
OctoPrint
OctoPi was installed on a Raspberry Pi computer. This is the operating system on which OctoPrint runs.
This OctoPi and OctoPrint software provide tools to control the Sand Table.
OctoPrint is commonly used to remotely control 3D printers.
In this case it allows control and monitoring of the sand table operation.
The program running in the Raspberry Pi will feed the GCODE instructions line by line to the Arduino via a USB cable.
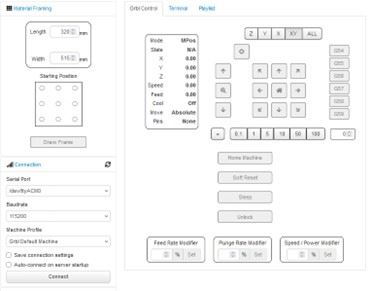
Operation
Connected to Octoprint running on the RaspberryPi over the wireless network. from my phone or laptop.
Within Octoprint screen
Connect serially using the ‘Connect’ button. Machine shows ‘Operational’.
‘Soft Reset’ button.
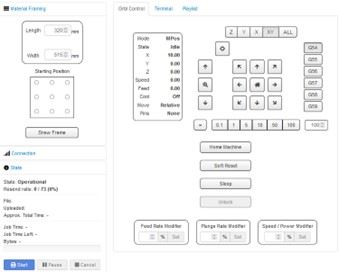
‘Home’ button After Home sequence performed, X position shows 10, Y position = 0, State ‘Idle’ |
|
|
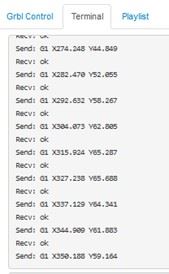
Either use the ‘Upload’ button to transfer a GCode file from the laptop to the table. Or select a previously uploaded file.
Select ‘Start’. The status window updates. The Terminal window shows the GCode commands. The Ball moves and creates the pattern. |
|
|
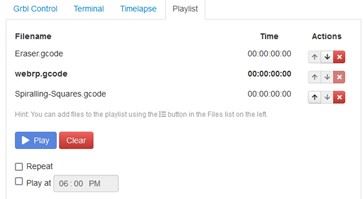
It is possible to concatenate many G Code files into a
playlist. In the playlist, between
pattern prints, it is possible to play an ‘Erase’ pattern, to smooth the sand
of the previous pattern before the next pattern is played. |
|
|
The ball slowly and silently rolls around the table creating and erasing an endless series of patterns in the sand.
The pattern or playlist continues even if the wireless link to OctoPrint from the laptop is closed.
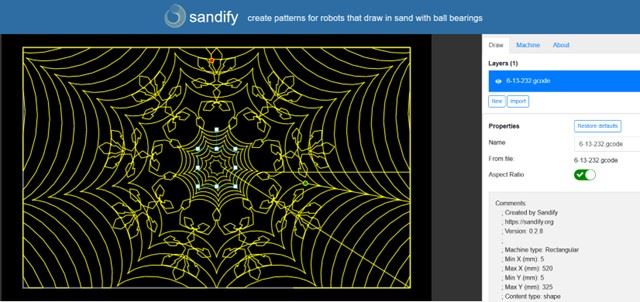
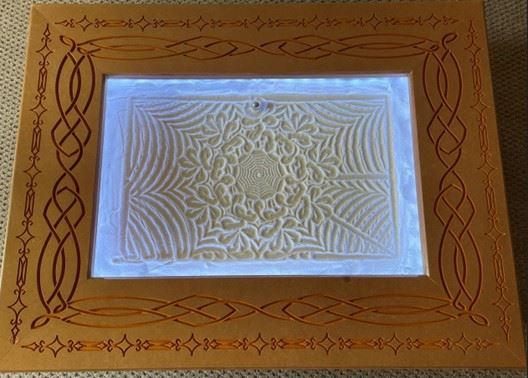
The Sandify App
This free App can be used to create patterns for the Sand Table which can then be exported as G Code to the table.
Below is one pattern made recently.
It consists of 3 layers, set up in a sequence such that the sand table draws the 2 web patterns first, then the flower pattern is drawn over the top of the 2 web patterns. |
|
|
The pattern took 27 minutes to draw on the Sand Table. |
|
|
|
|
|
|
Close-up photo of sand pattern |
|
|
|
|
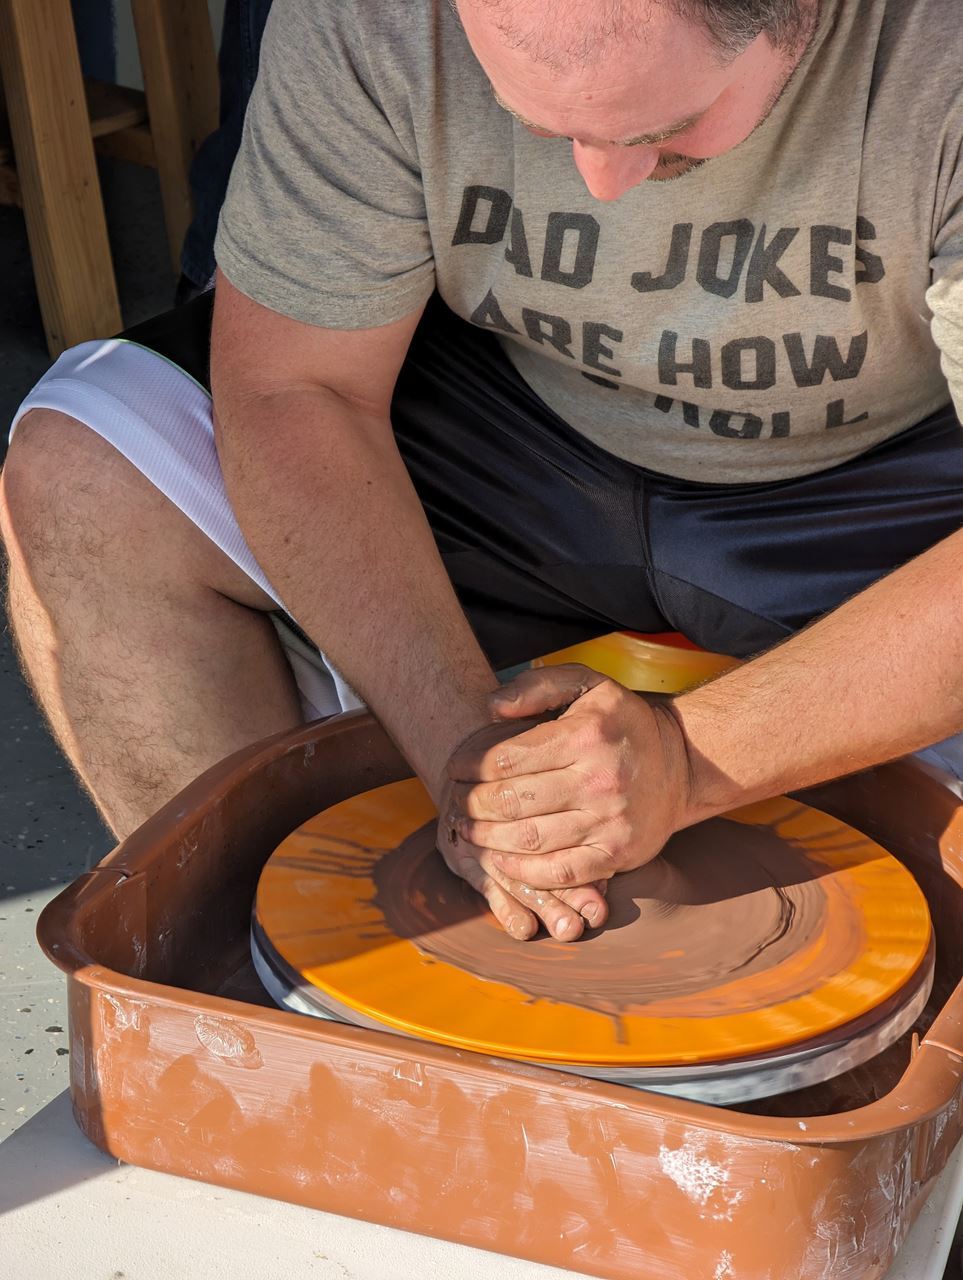
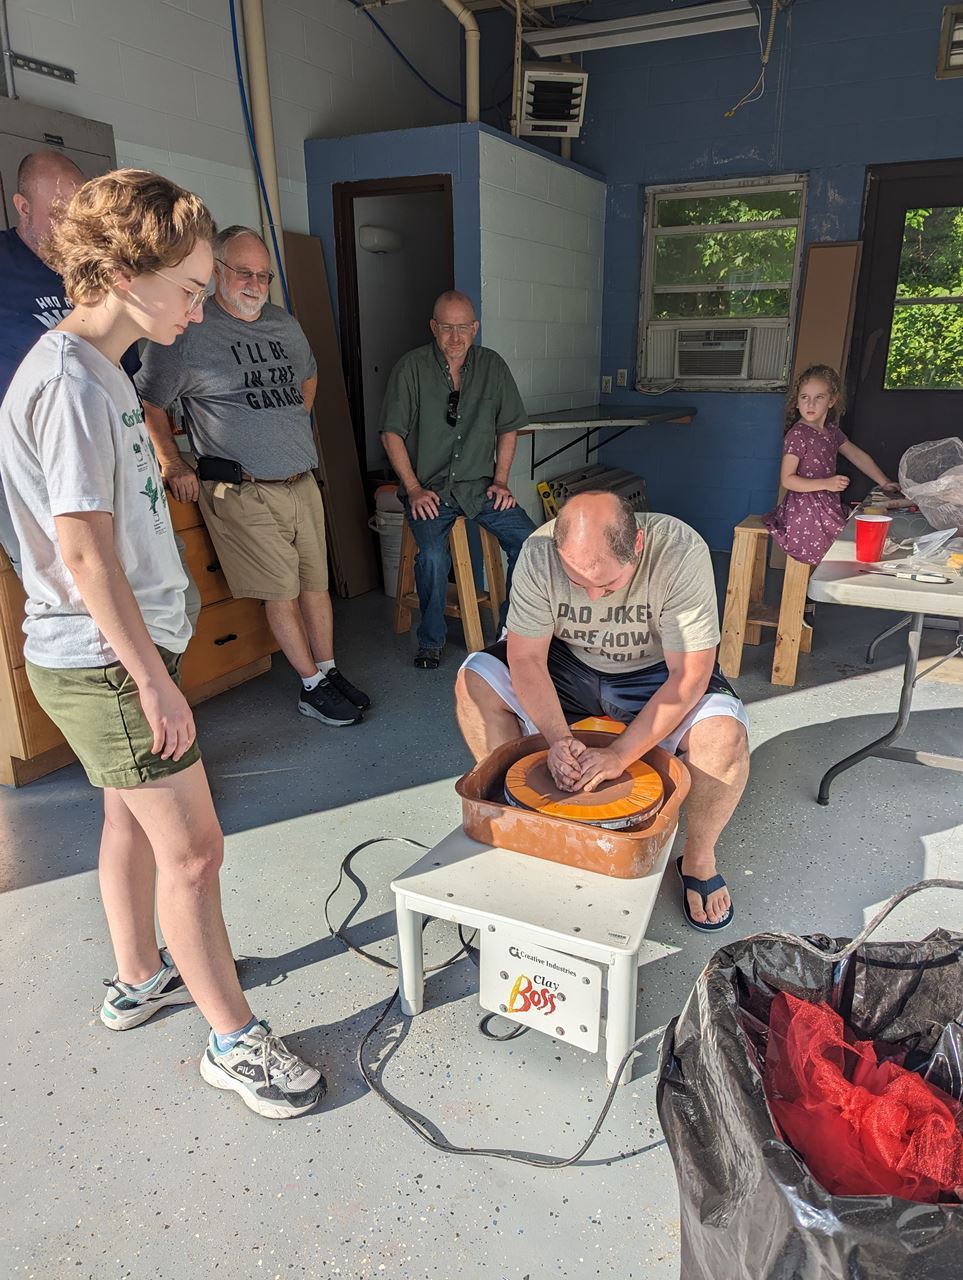
Grand Re-Opening of the Ceramics Shop in Julycome by and check it out! Join the #ceramics channel for more information |
|
|
|
|
Your email provider may be cutting off the end of your newsletter! Be sure to click "View Entire Message" if you are seeing "[Message clipped]" at the bottom of your newsletter
|
|
|
|
|
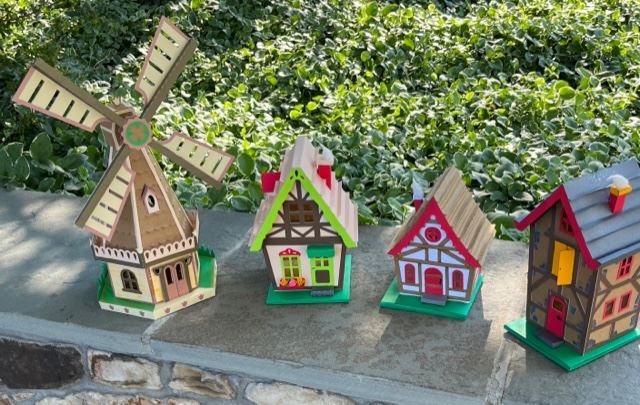
Paper houses, cut on the Cricut by Diane Painter and put together by several makers. The windmill really spins! |
|
|
did you know...you can find the newsletters from the last several years archived on our website? |
|
|
|
|
|
|
|
|
|
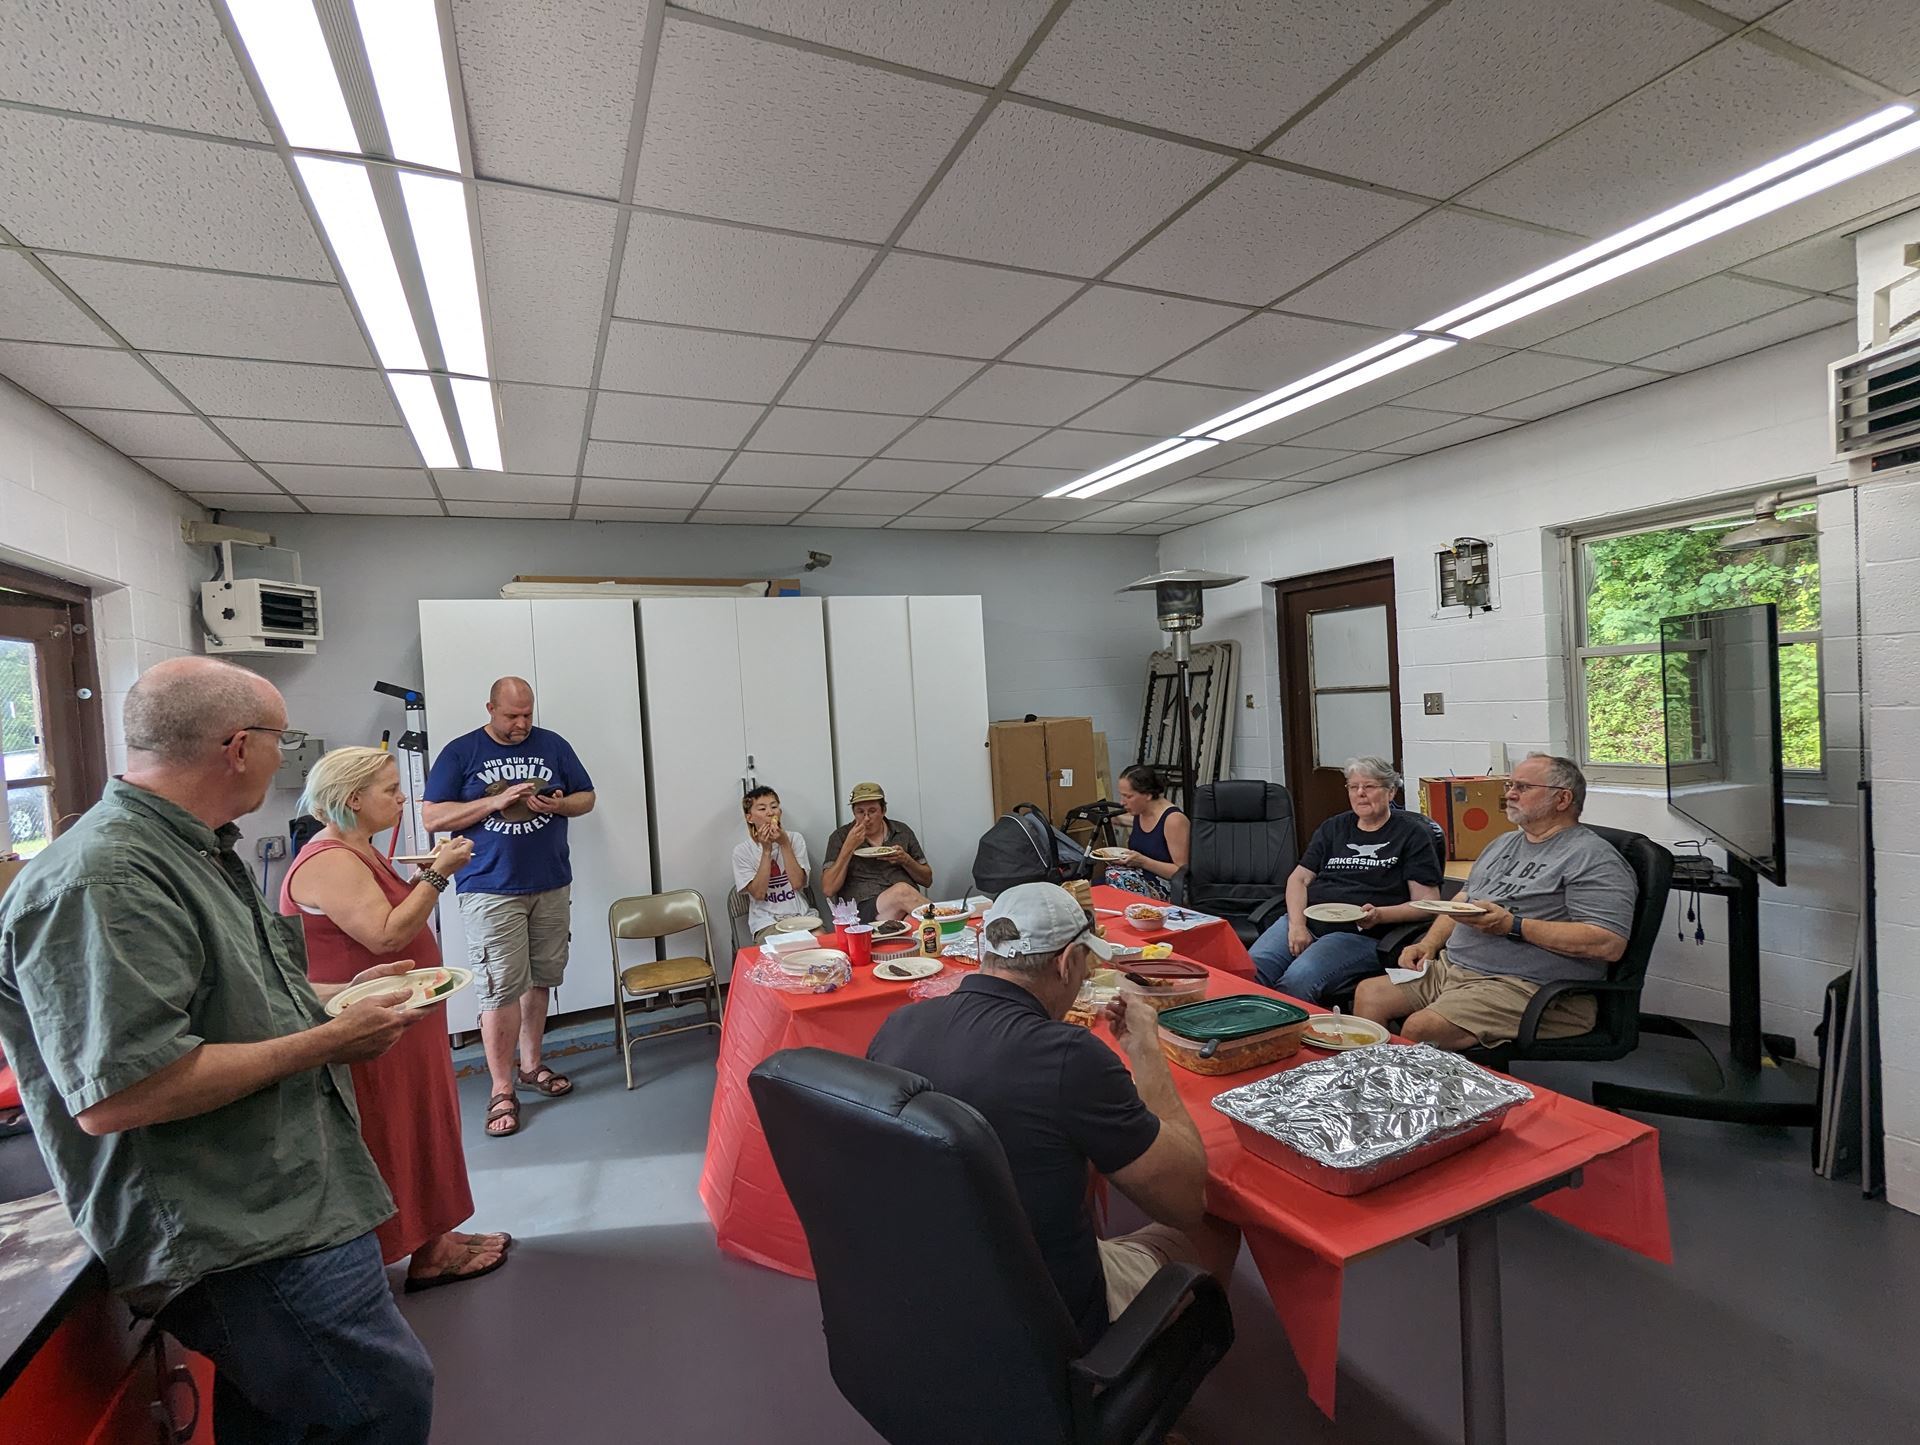
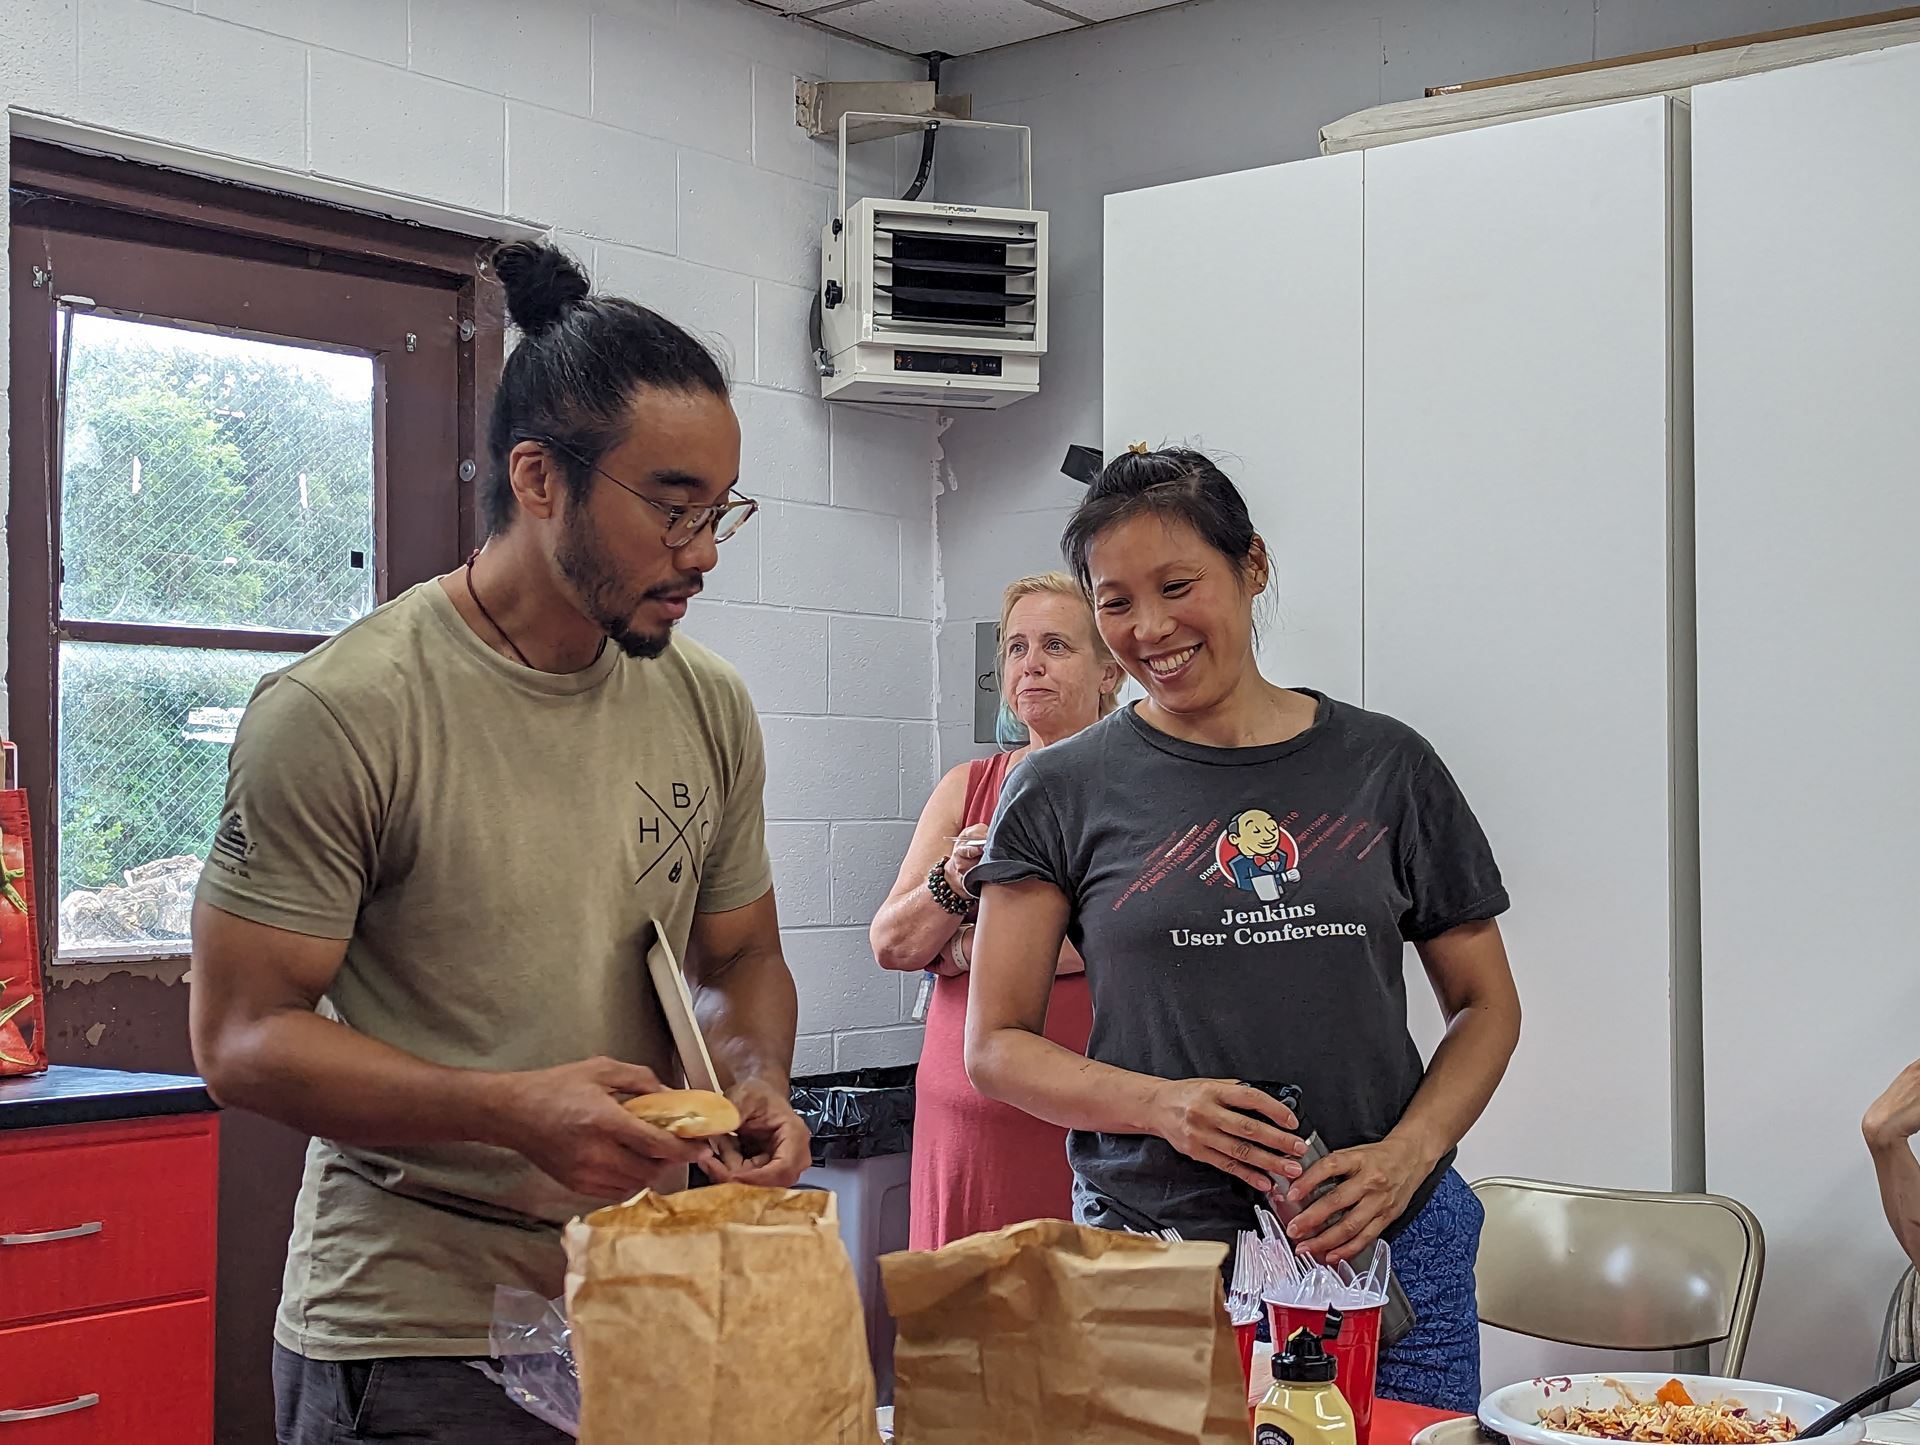
I heard...that the socials are a lot of fun! Have you been? |
|
|
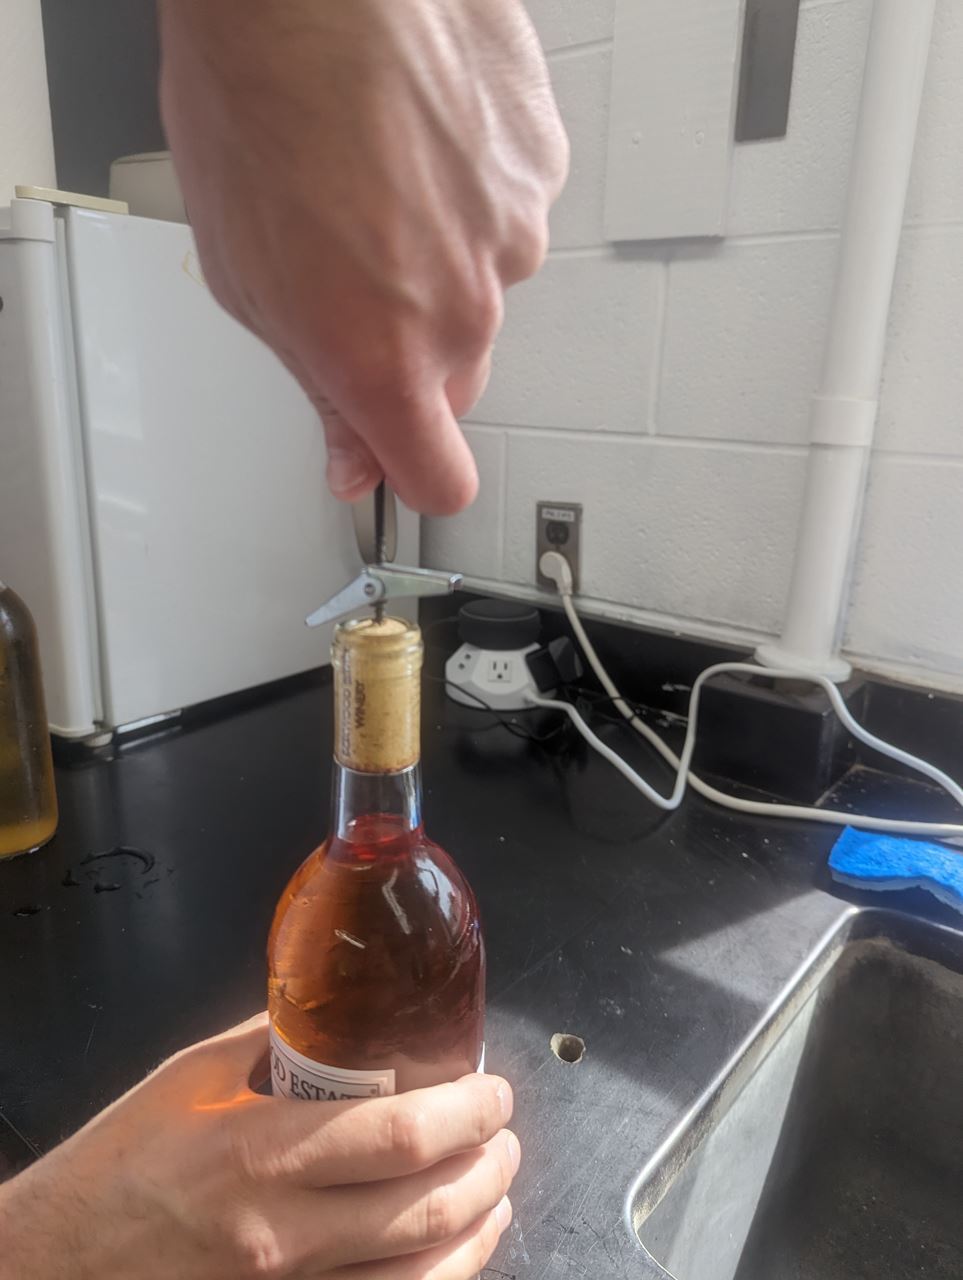
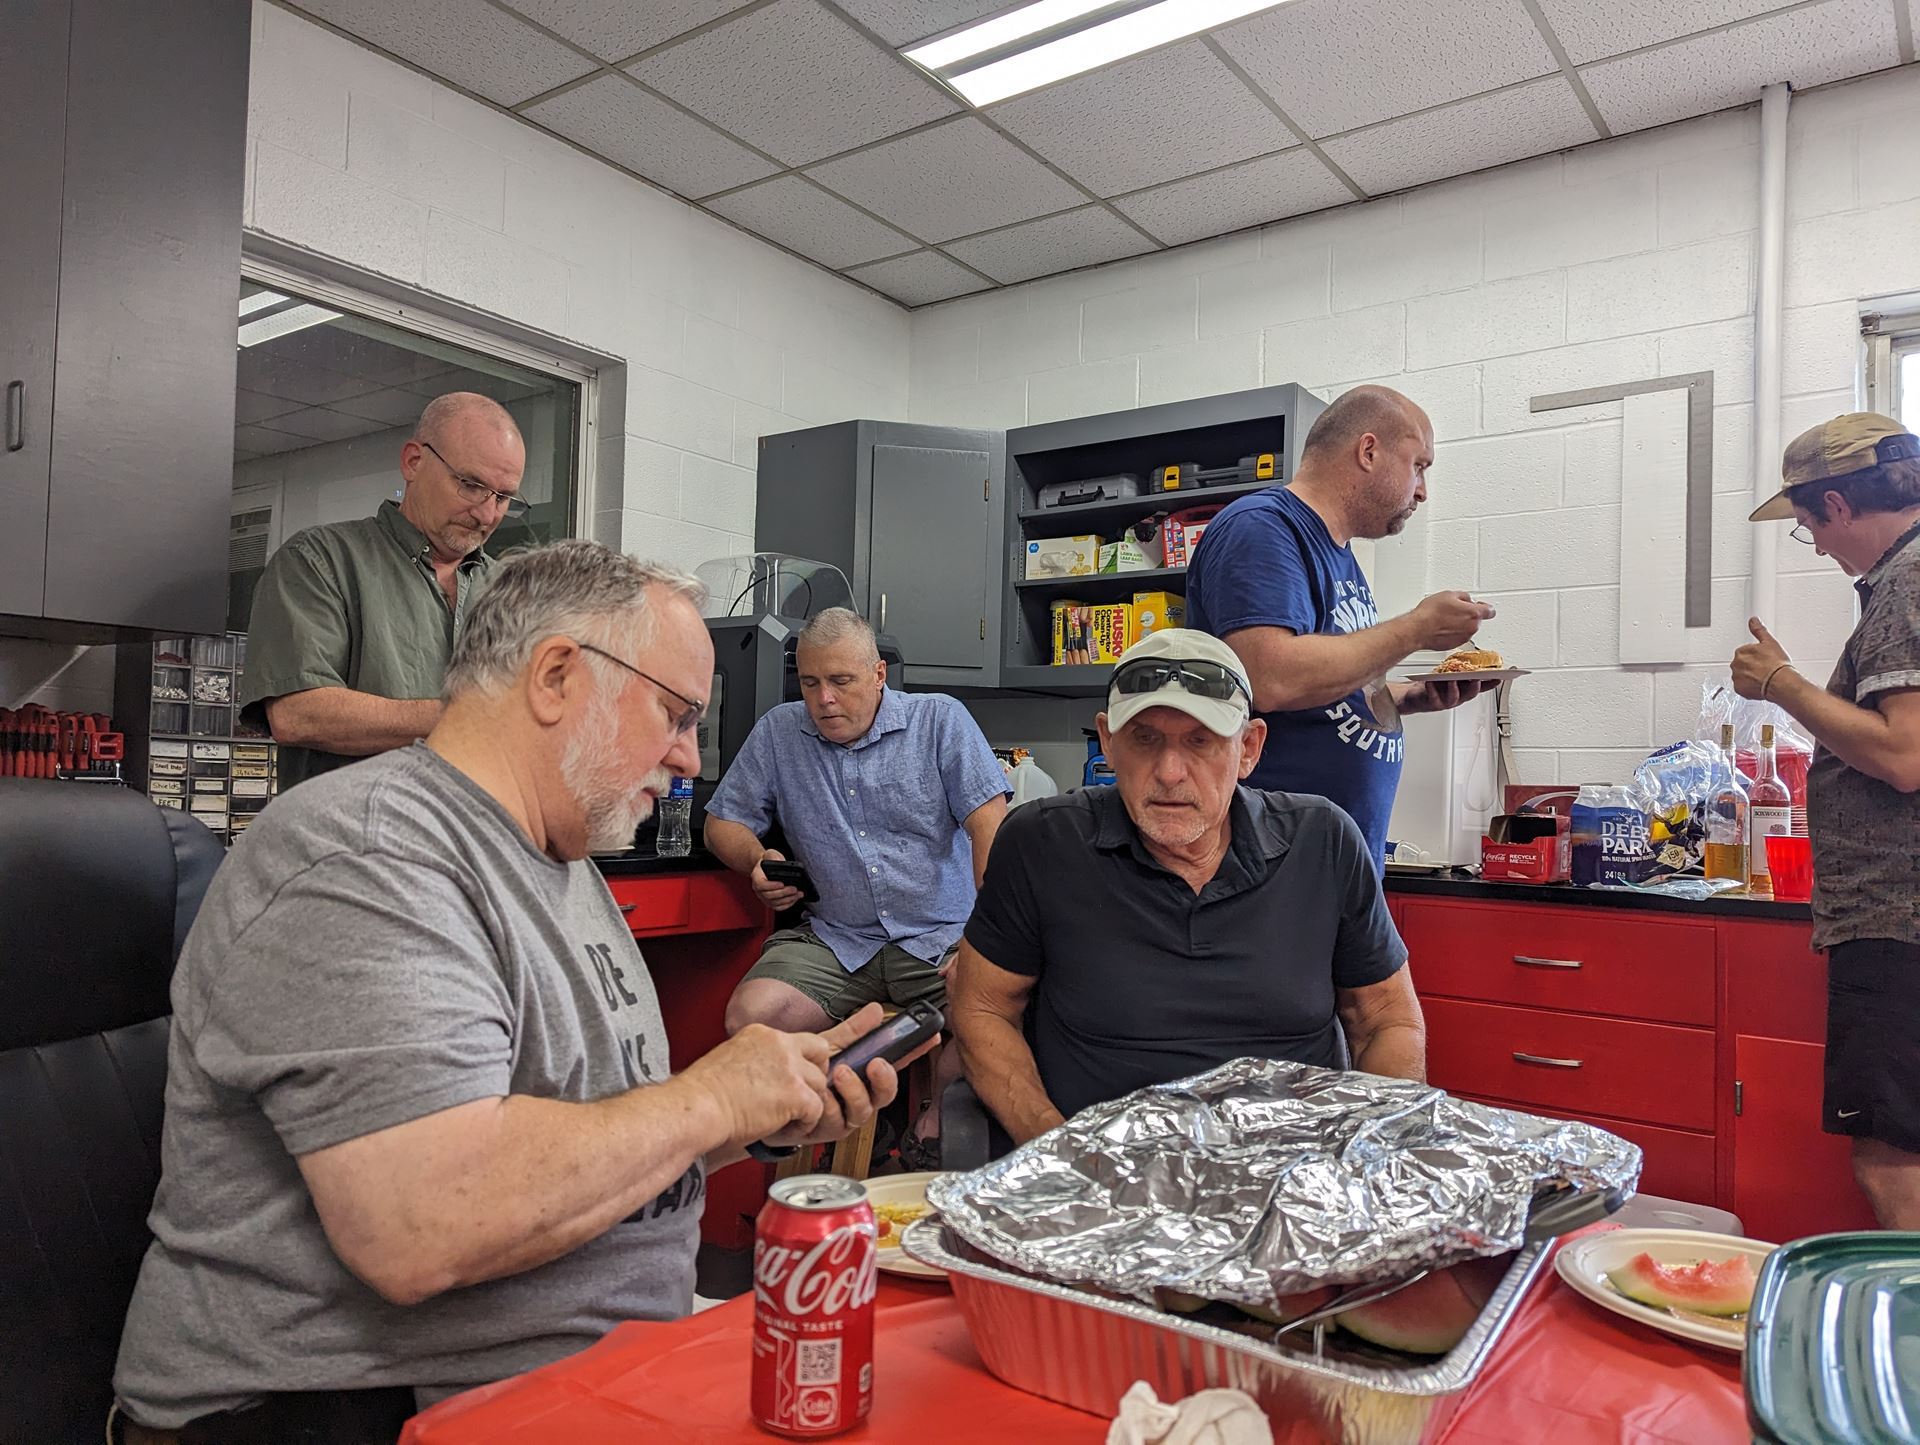
Picnic food at MSP in July! |
|
|
A lot of fun was had by all over delicious food! Getting to know your fellow makers! |
|
|
|
|
Did you know...
Makersmiths has a blog on their home page?
Makersmiths is on Instagram?
Makersmiths has a YouTube page? |
|
|
|
|
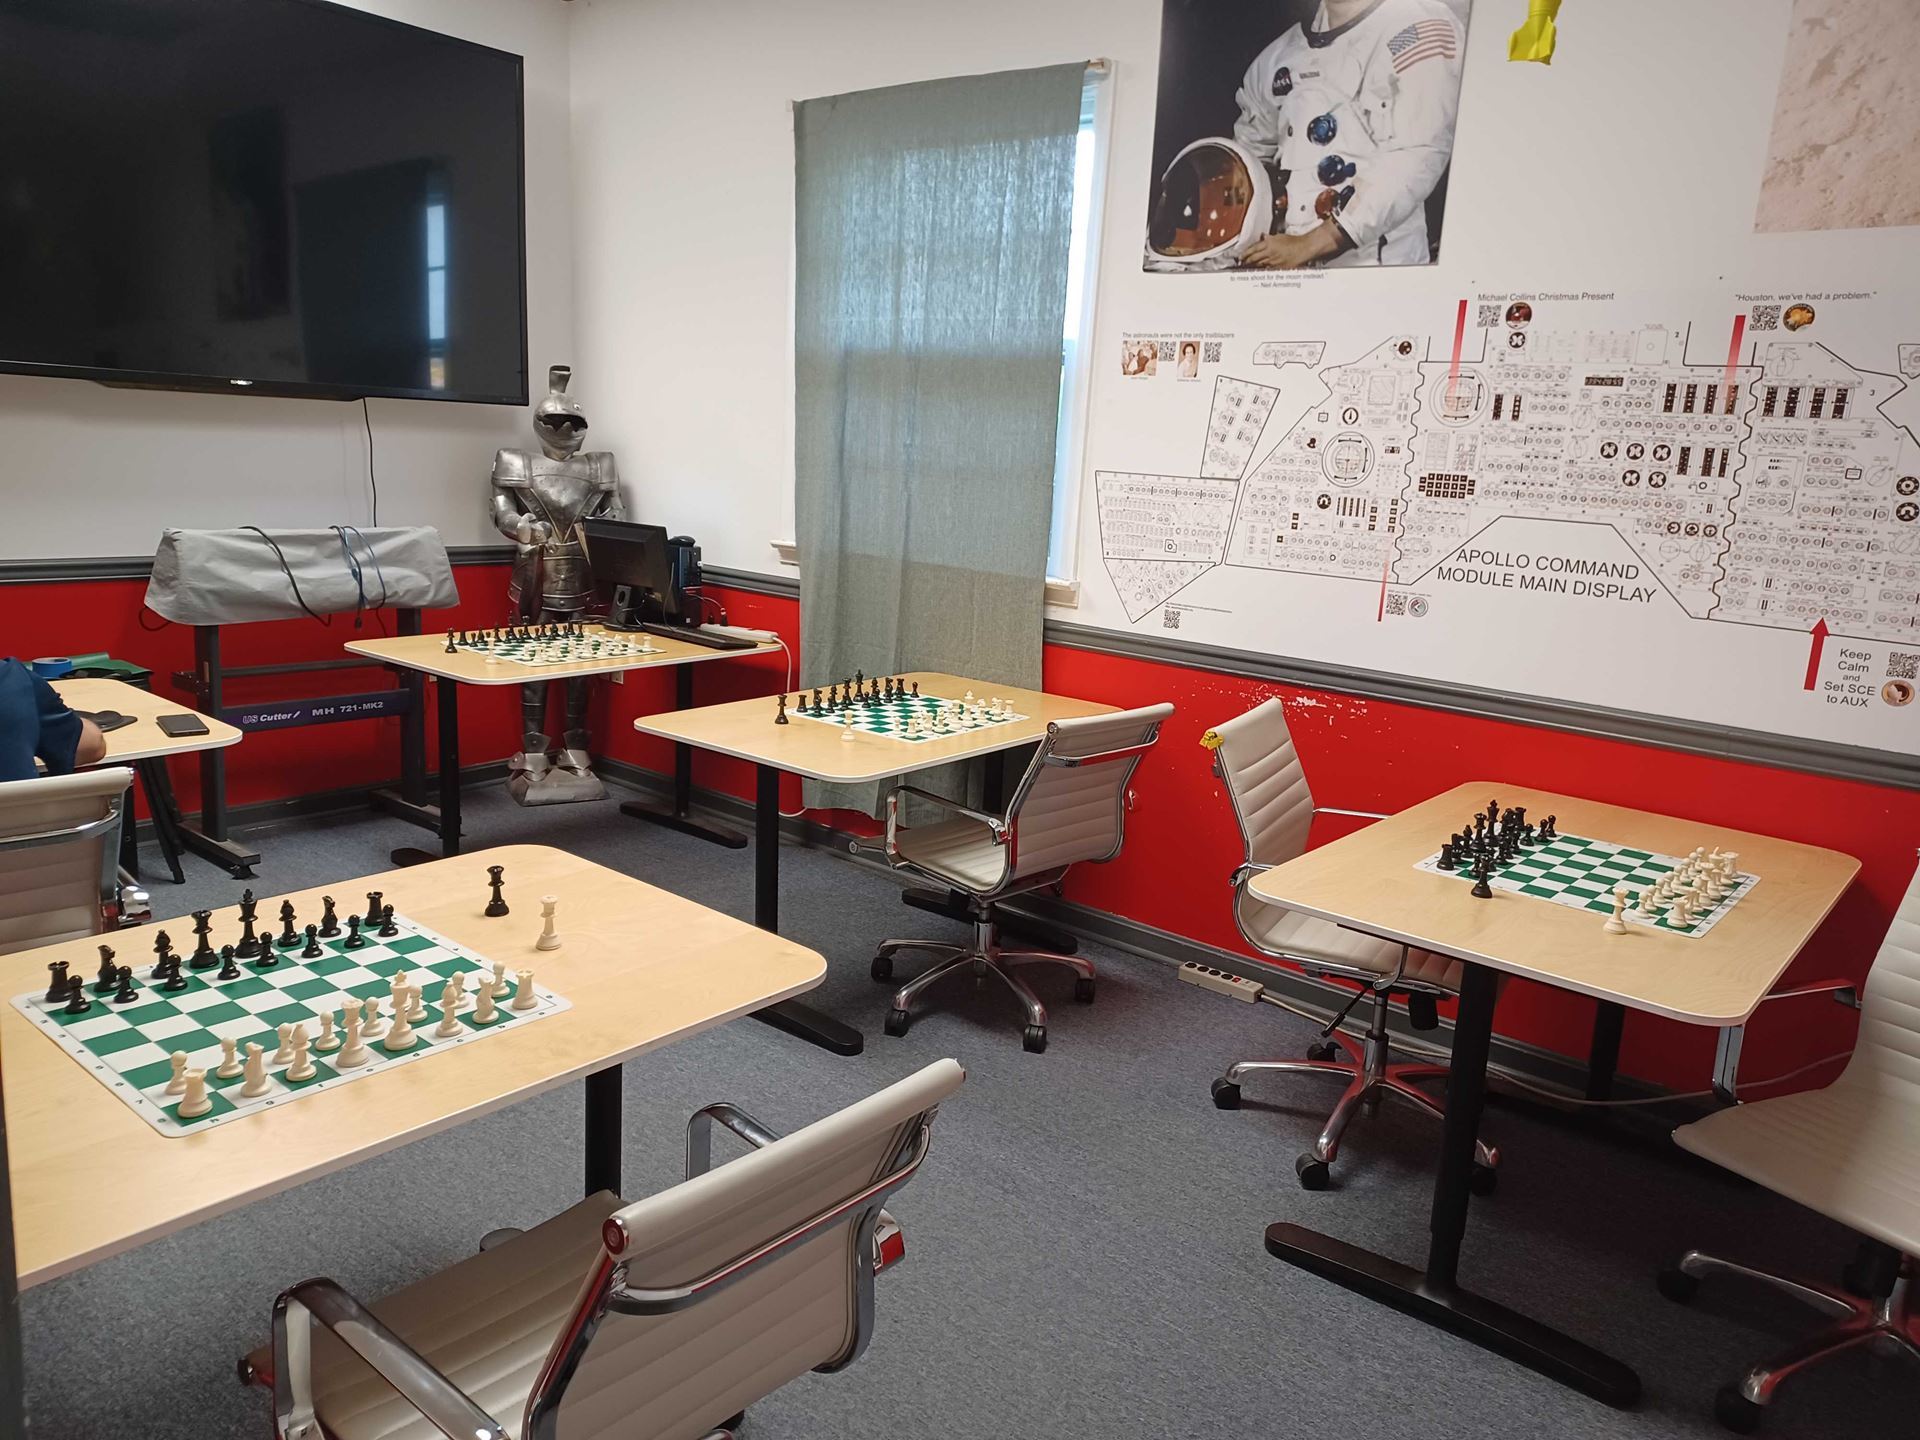
Pawn ShopKen Fuentecilla My father taught me how to play chess when I was young. It was the basics. Pawns move forward one space. Rooks move in straight lines. Bishops move diagonally. Knights make “L’s” and your queen can move ANYWHERE! He said, “Protect your king at all costs.” I never won a game against my father. I didn’t care. My strategy was to collect as many of his pieces just so I can line them up in front of me like…prisoners of war. Fast forward many years later and I rediscovered chess after binge watching Netflix’s “The Queens Gambit.” I decided to join an online chess community and I start playing people from all over the world. I quickly learned that I am not good at this game. Not at all. Defeat after defeat, loss after loss. Falling for traps and being checkmated in less than ten moves! It was fun and frustrating, but mostly frustrating. Tired of losing, I began watching hours of Youtube videos, learning a few openings and some tactics. They say that during a chess game, players can have a heart rate of more than 160 bpm, which is equal to that of an athlete. I finally got my first win, and it was…anti-climatic. Something was missing. I realized that I missed collecting my prisoners of war. Playing over the board chess is a much different experience than playing the game online. You don’t see or hear the breath of excitement after a great move nor do you hear the sighs of frustration from your opponent after they blunder. So I started Monday Night Chess at the Makersmiths in Leesburg. The first few nights were crickets, but as the saying goes, “If you build it, they will come.” Now we have a few regulars and many stop by for a game or two!
Whether you're a grandmaster or a lowly woodpusher, everyone is invited to push some pawns and trade some rooks in the small classroom. The casual weekly chess night meets every Monday at 6pm until whenever. First come, first served, and all skill levels are welcome. This is an informal over-the-board chess night. There are no clocks and no worries. Coffee and snacks are served while the music plays in the background. Anyone can come and play - just walk in! And if you are new to the game, there are players that can show you the basics, so that anyone can start taking prisoners of war. |
|
|
|
|
|
|
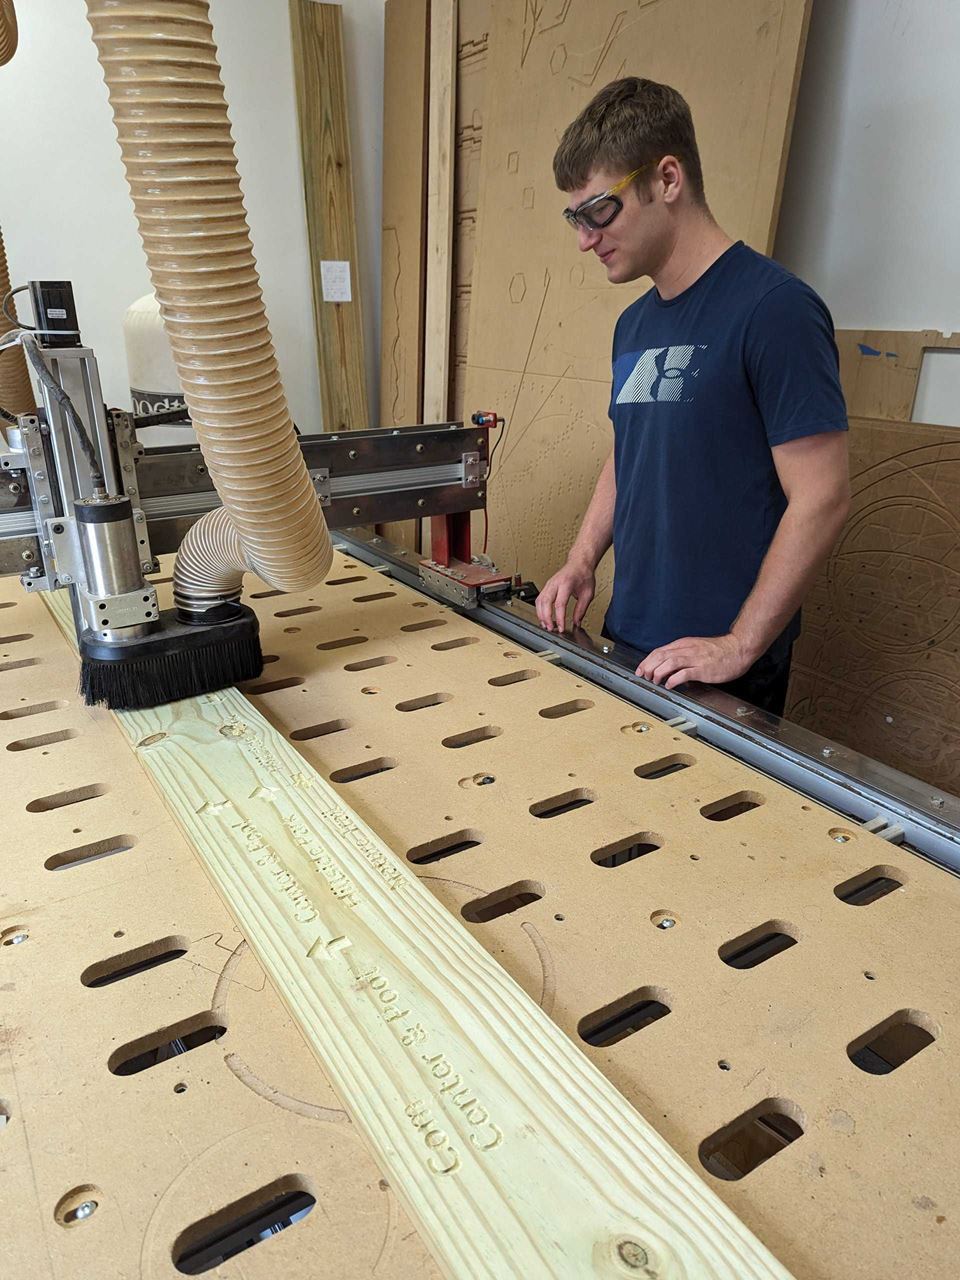
Carter Hawkin working on his Eagle
Scout Candidate way finding project consisting of 11 signs to go on 6 posts to
be located on the Broadlands community trail system |
|
|
|
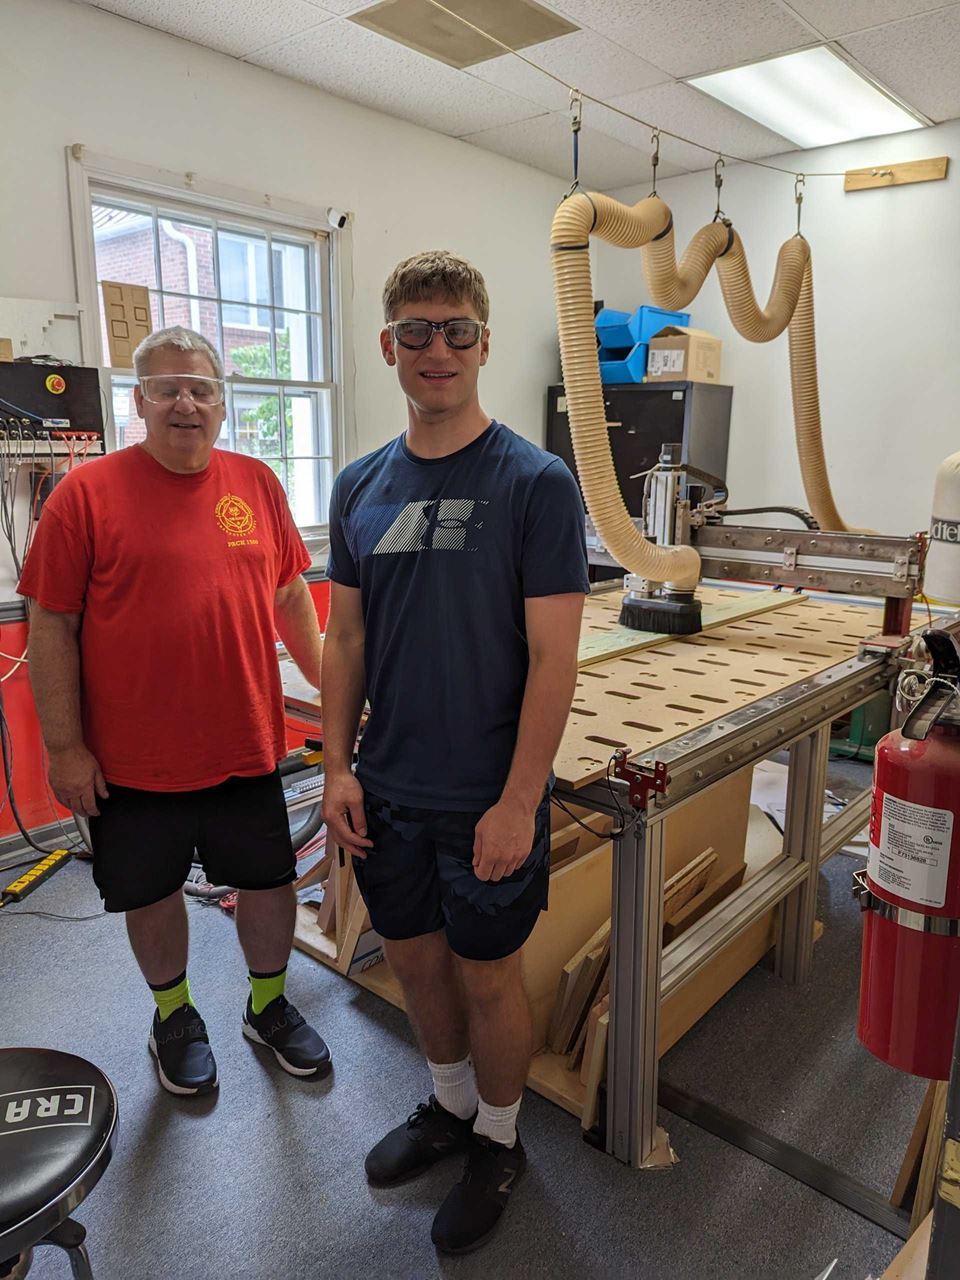
Carter
Hawkins and his Dad at the Big Red CNC at MS-Leesburg
|
|
|
|
|
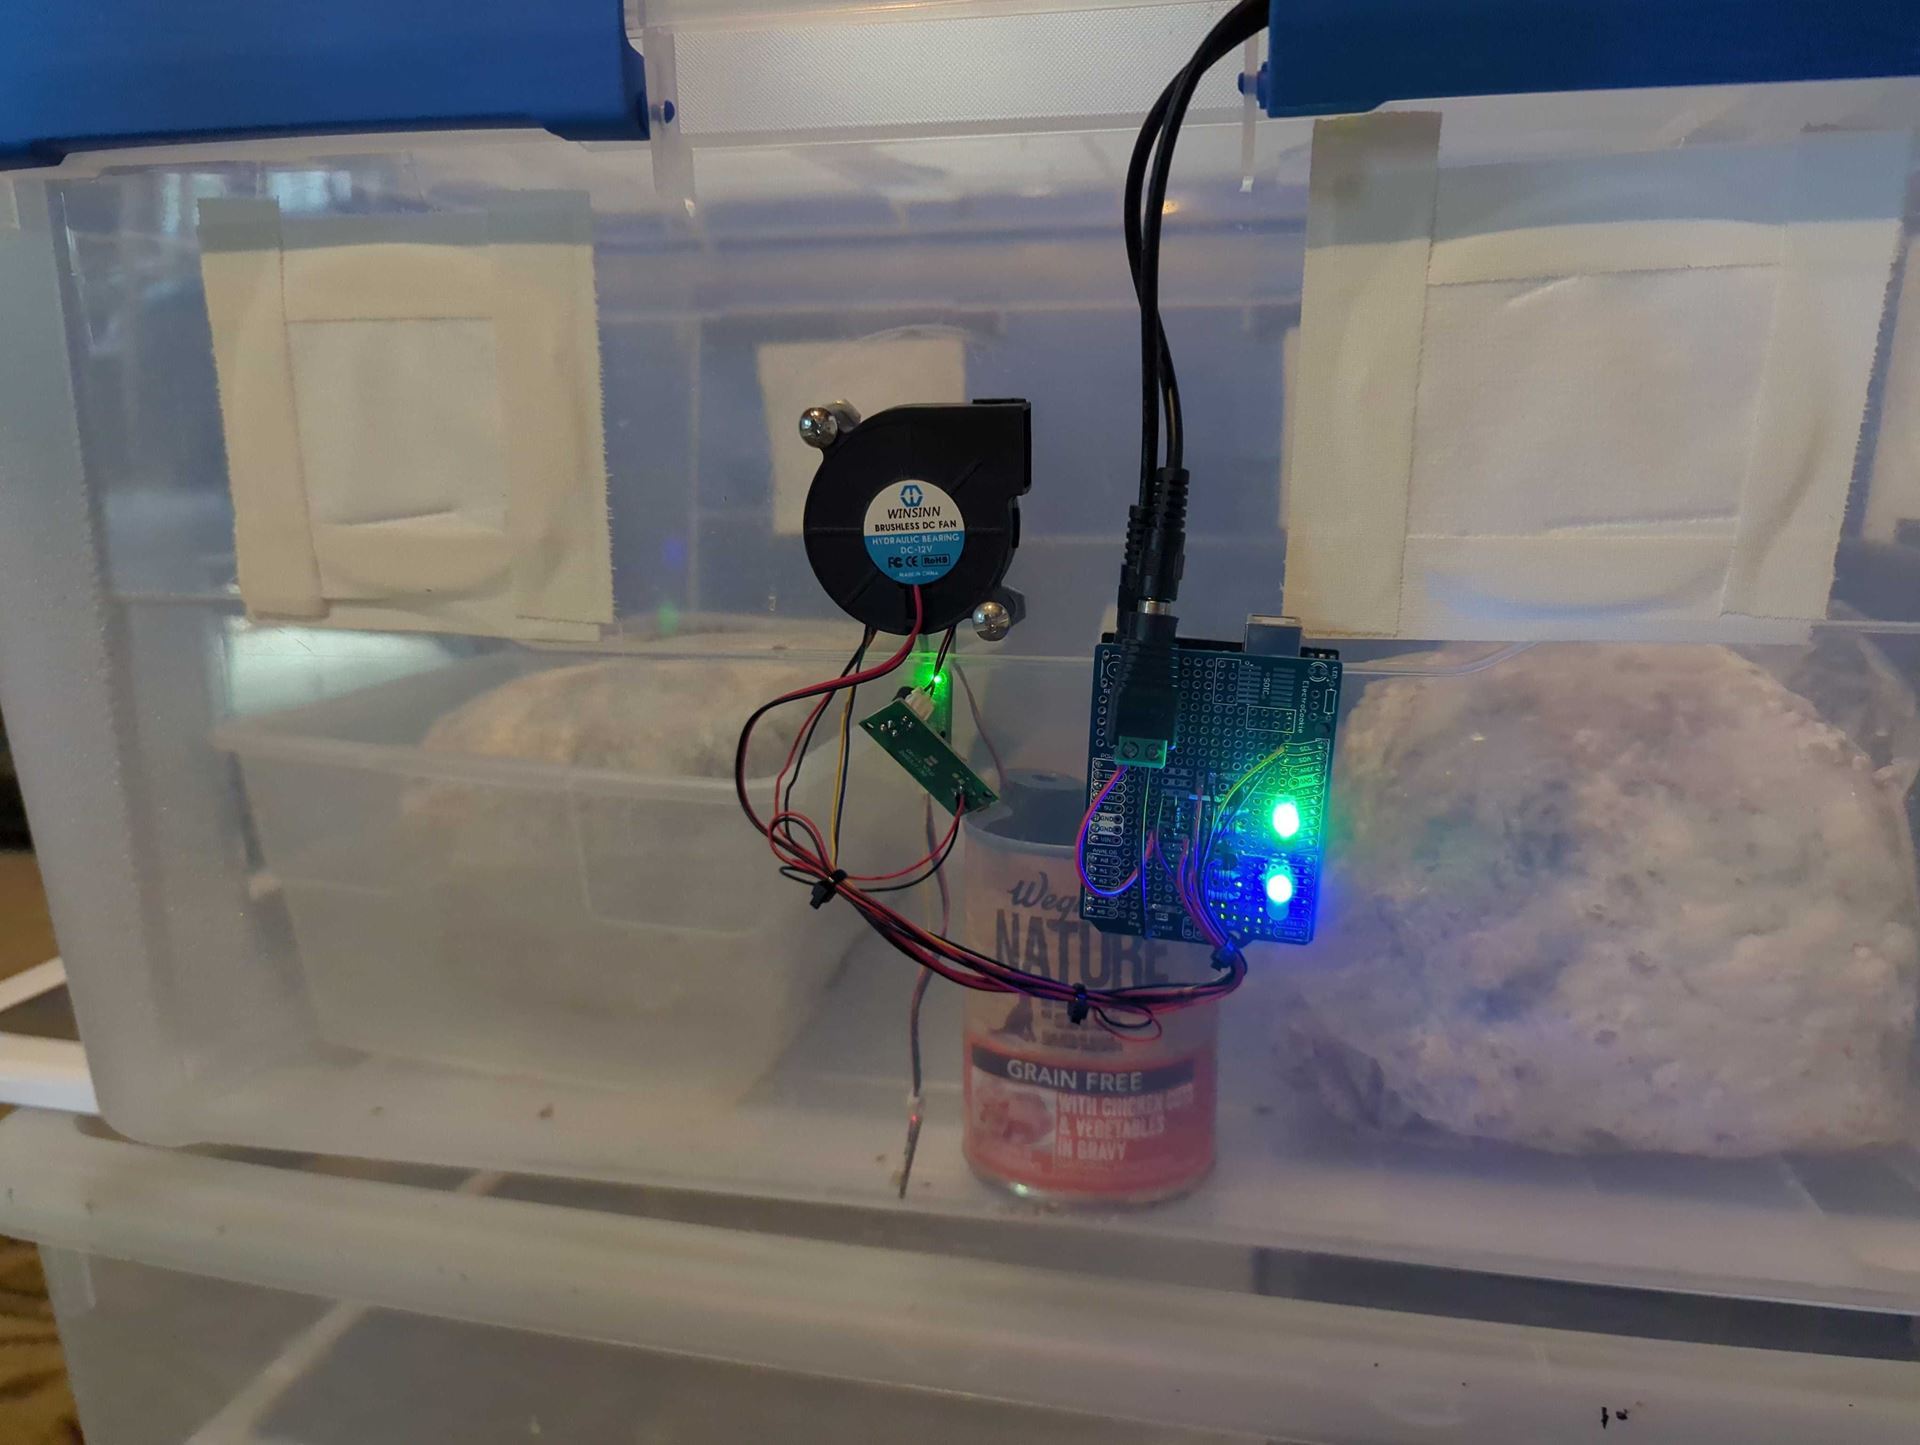
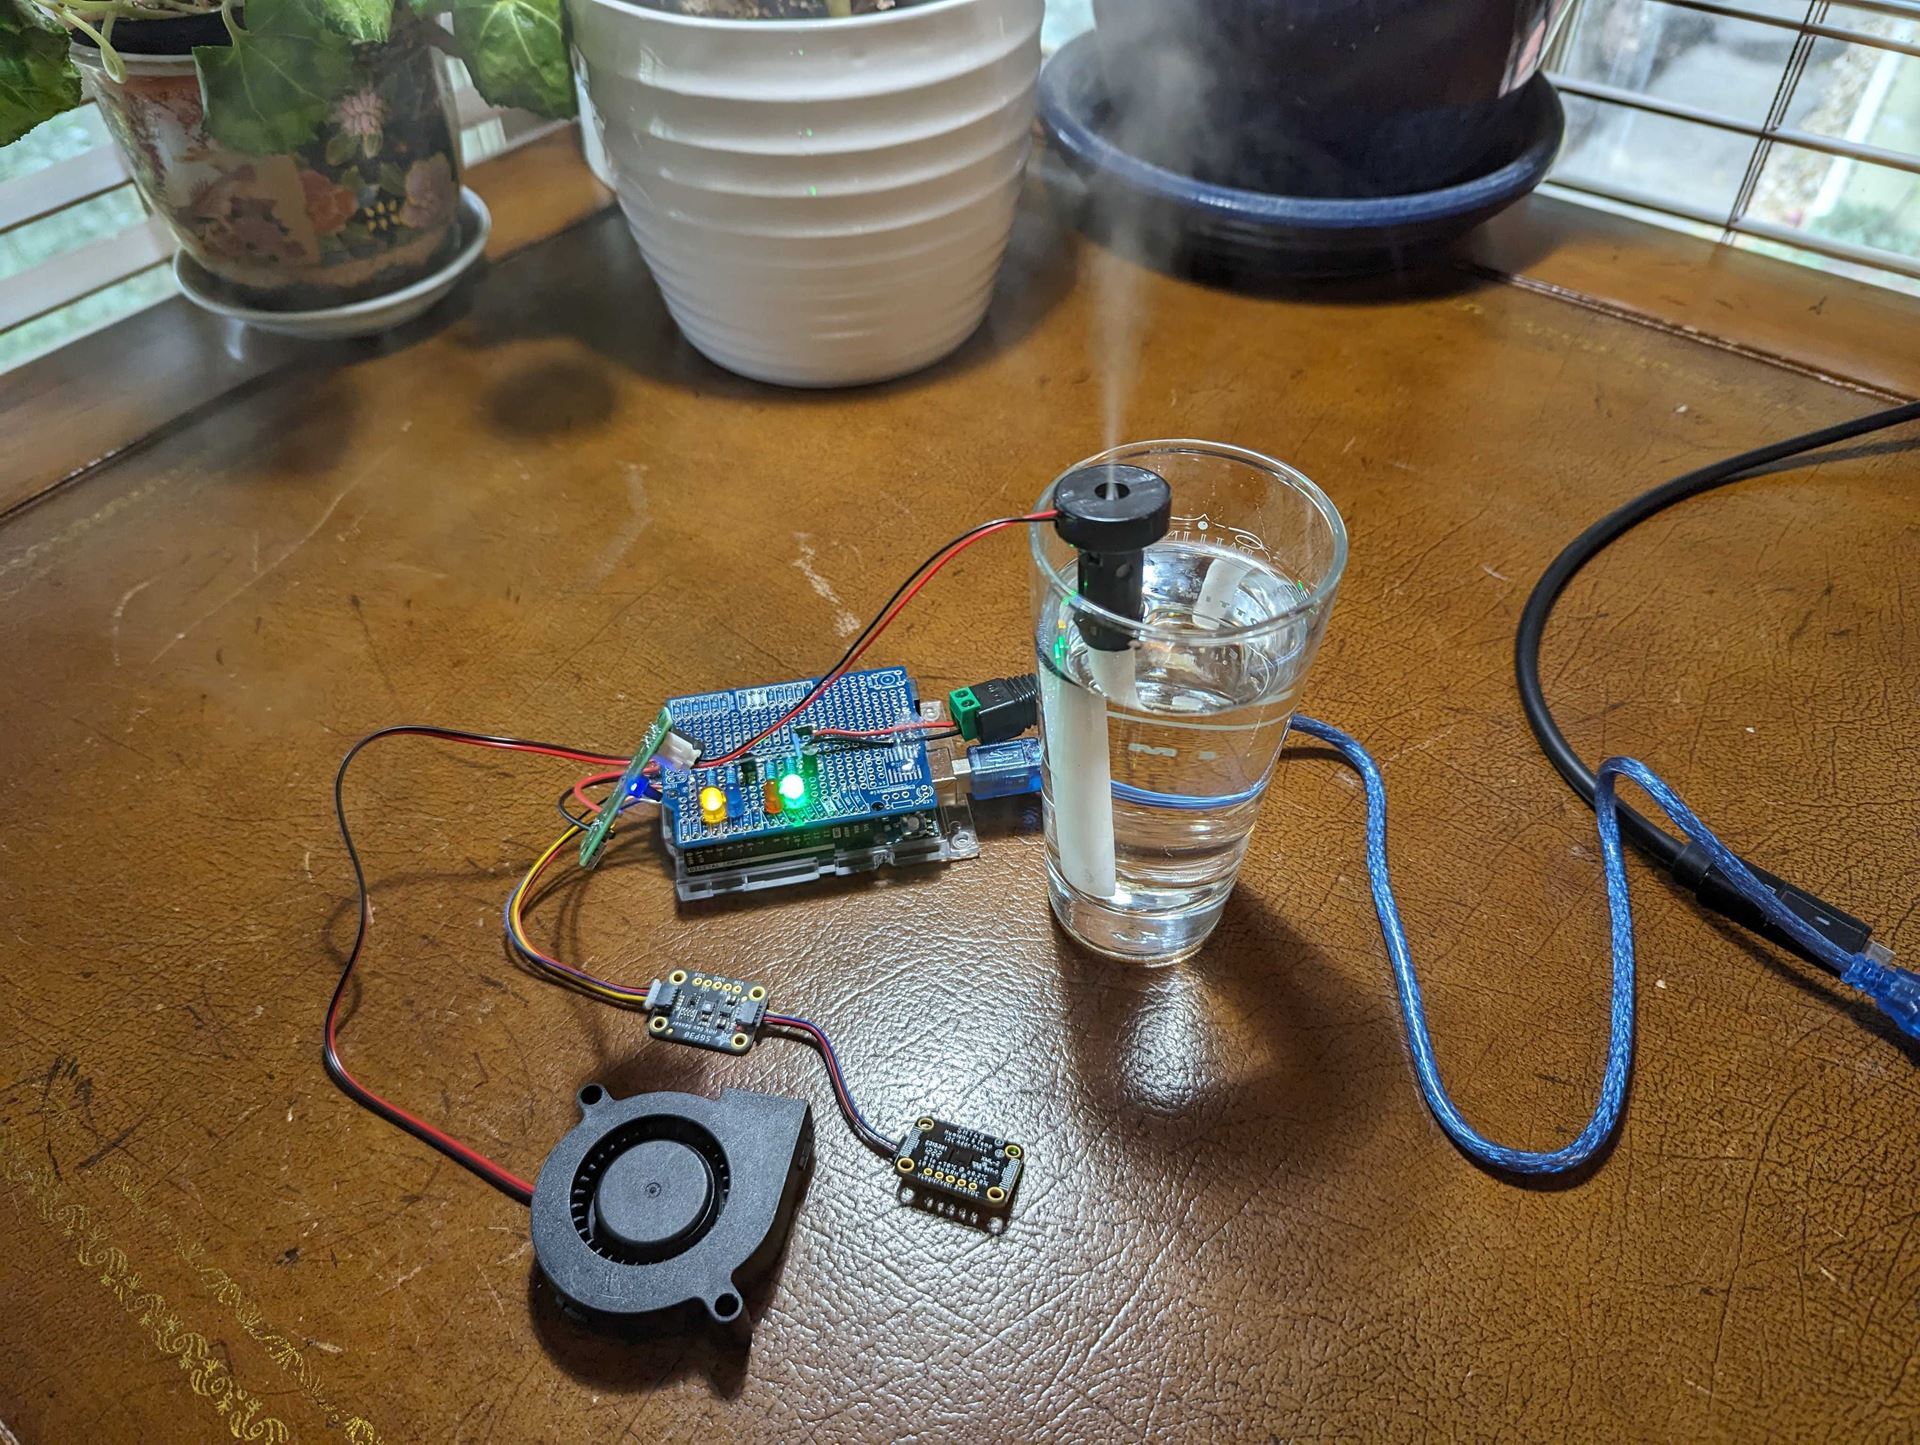
Adventures with Fun-giBob Ragsdale A short while back I purchased a mushroom growing kit thinking “how hard can this be?” It turns out keeping the growing environment sterile, with the right humidity, and CO2 levels, and good air exchange is kind of tricky. Of course you can purchase whole setups with sensors, fans, and humidifiers to control the environment, but the only ones I found big and clunky, repurposed from terrarium equipment. As a maker I needed something far more elegant. After a bit of research I resolved to build it myself using an Arduino. The only issue was...I didn’t know how to program or wire one. Not knowing how to make something is not a problem when you are part of Makersmiths because there are a lot of people around that can help. With a bit of member guidance and a bunch of research and work on my own, I have built two automated growing chambers that I am really proud of. Here’s how: Step 1 - I posted my project concept in the Makersmiths Slack.
Step 2 - Geoffrey Hoffman responded, inviting me to Electronics night where he lent me some Arduino and electronics gear and suggest a couple of research avenues.
Step 3 - I stepped through the tutorials on the Arduino web site.
Step 4 - Purchase the sensors and mechanical bits that I needed.
Step 5 - I wrote the code.Now let me pause here because when I began this project I didn’t know how to write code for Arduino (I know some HTML). By using the code examples that come with the sensors, and the help of ChatGPT, I was able to create the code I needed and get it running on the Arduino. Step 6 - Wire the Arduino.Again, I am no electronics expert. I have basic soldering skills but resistors, transistors, etc. are all new to me. Pulling relevant information from various examples in the Arduino tutorials and other online research enabled me to prototype then build a clean piece of electronics that works well. Step 7 - Monitor and tweak the code.With my newfound confidence I am able to modify the code to in-turn adjust the required humidity and CO2 levels in the growing environment. Today however, I noticed my mushrooms were showing signs they aren't getting enough fresh, filtered air. With the help of my buddy ChatGPT, I created and have I added a code block that turns the air exchange fan on for 2 minutes every 30 minutes. Hopefully that will sort things out.
While this project took a bit of time I learned three great new skillsets:
How to use an Ardunio and its peripherals (I can’t wait to build more stuff) How to use ChatGPT to assist me in programming (a great collaborator) How to develop and wire something more complicated than a light bulb (transistors always freaked me out.
And, I get mushrooms.
What will you make today? |
|
|
|
|
|
|
|
|
|
|
|
|
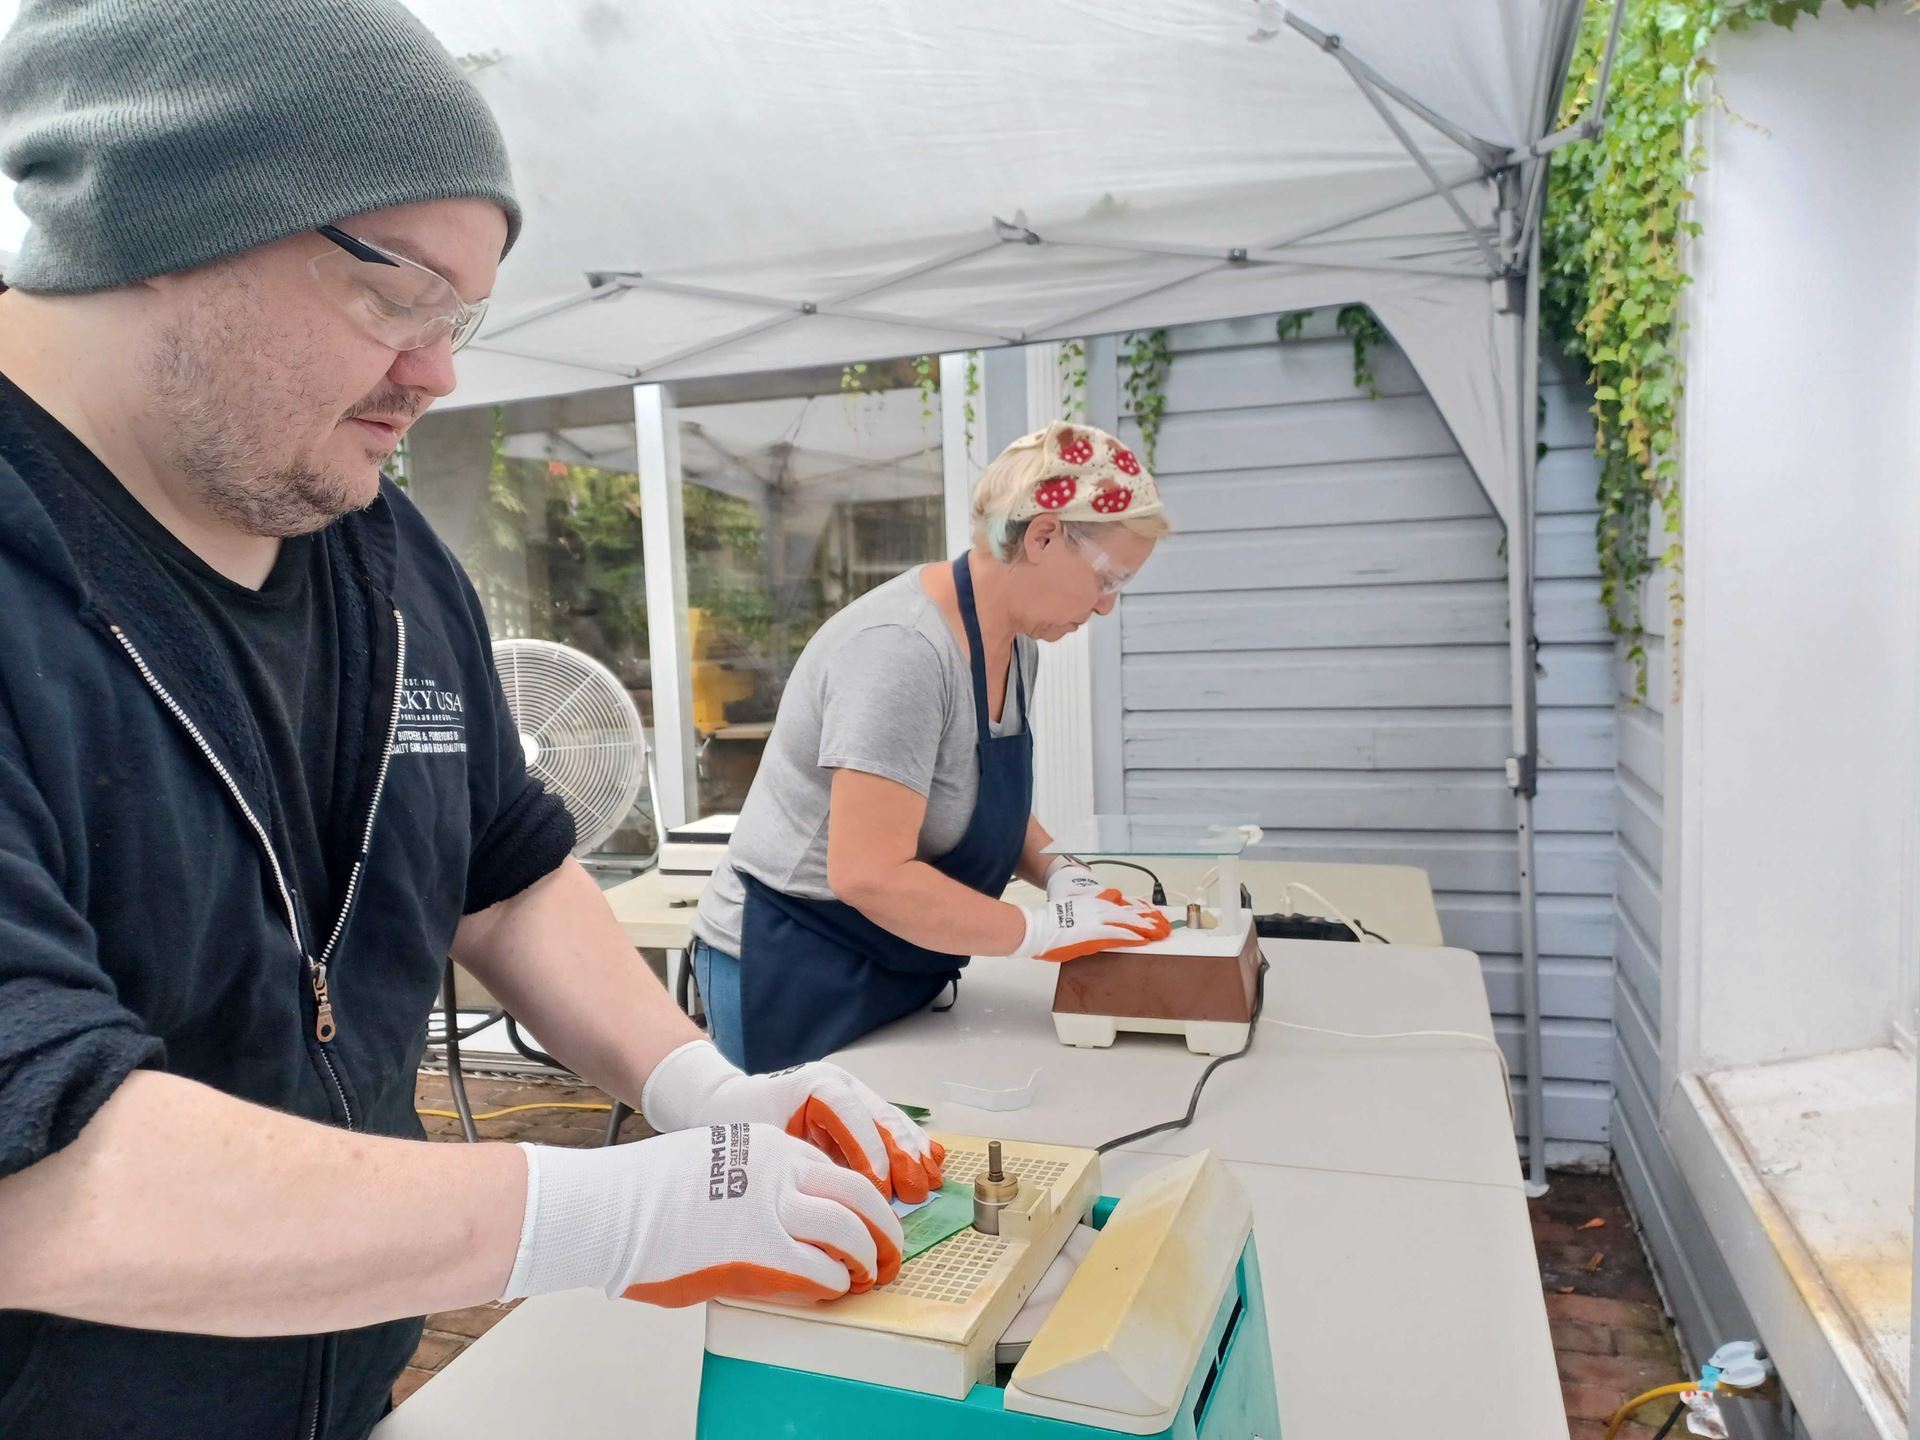
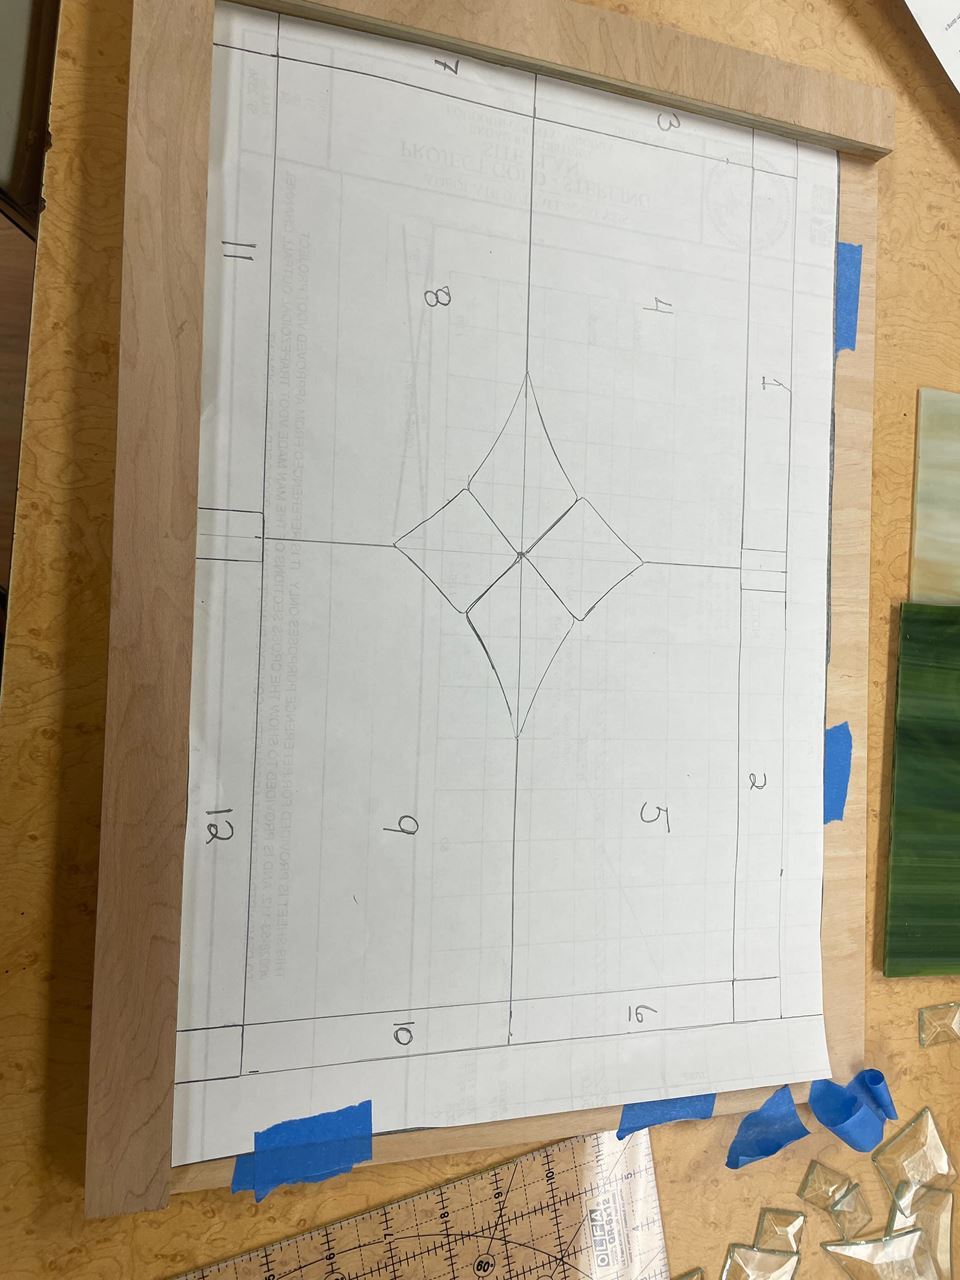
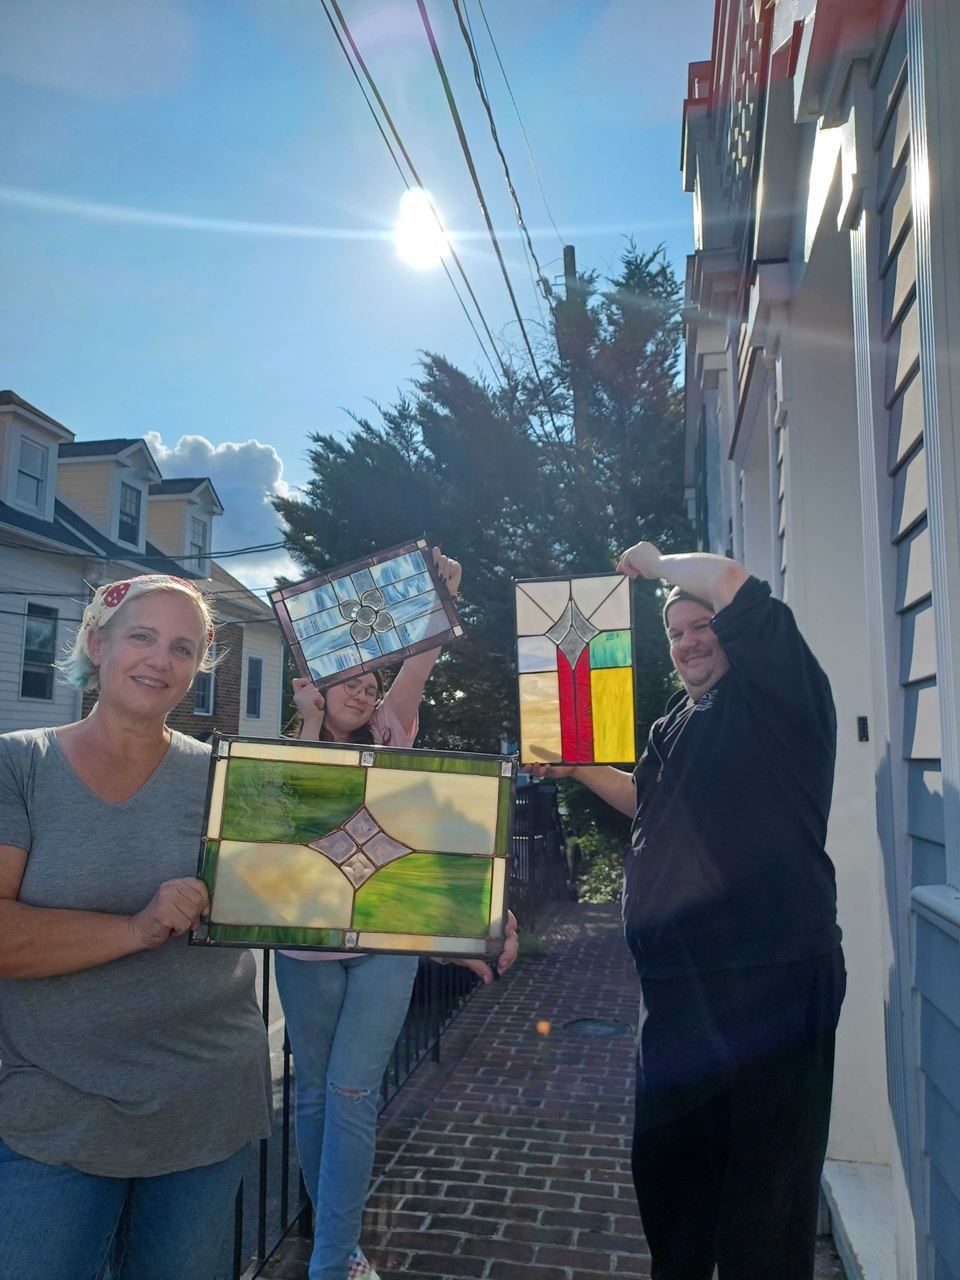
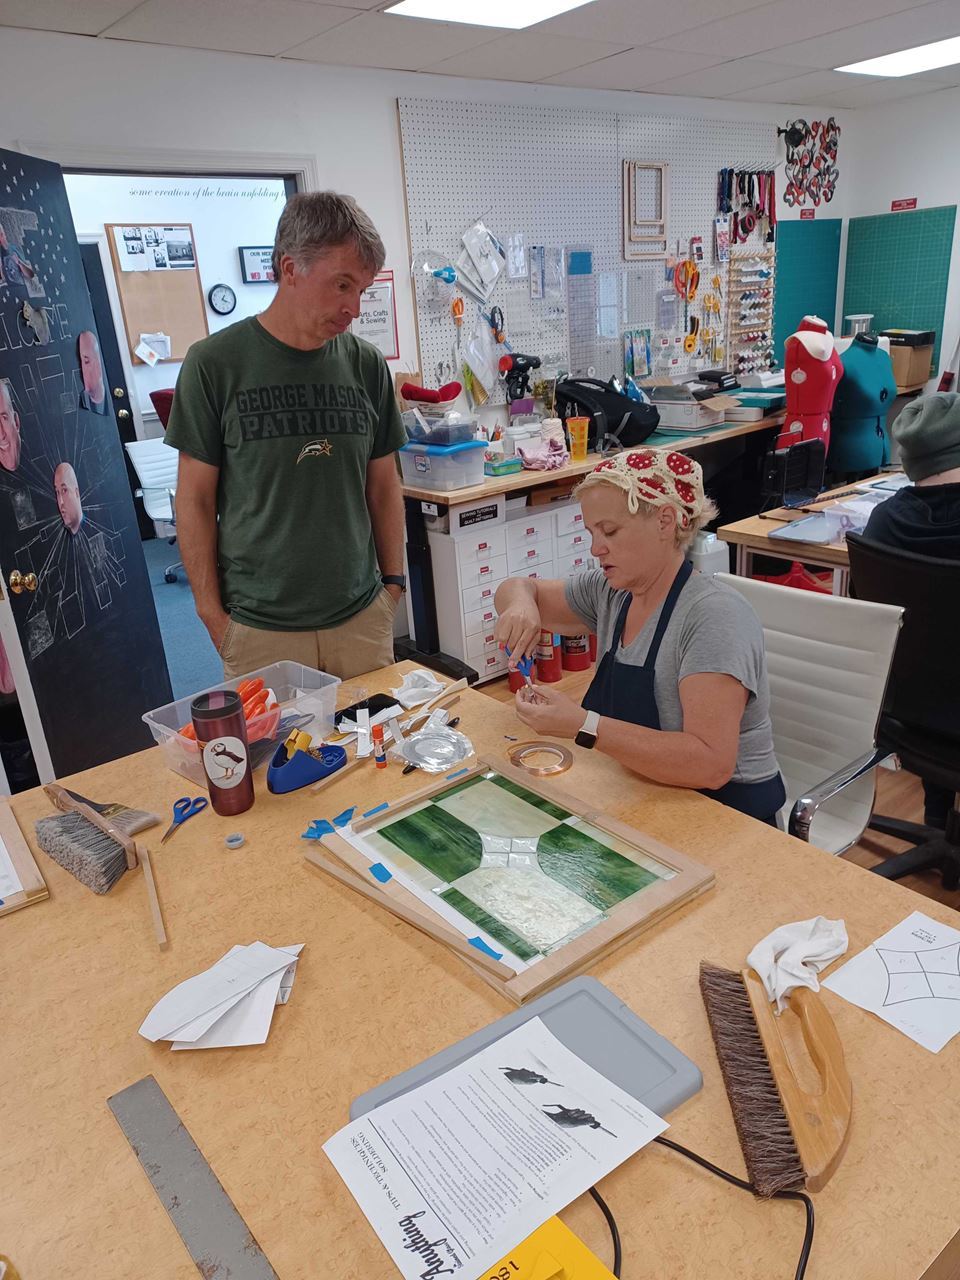
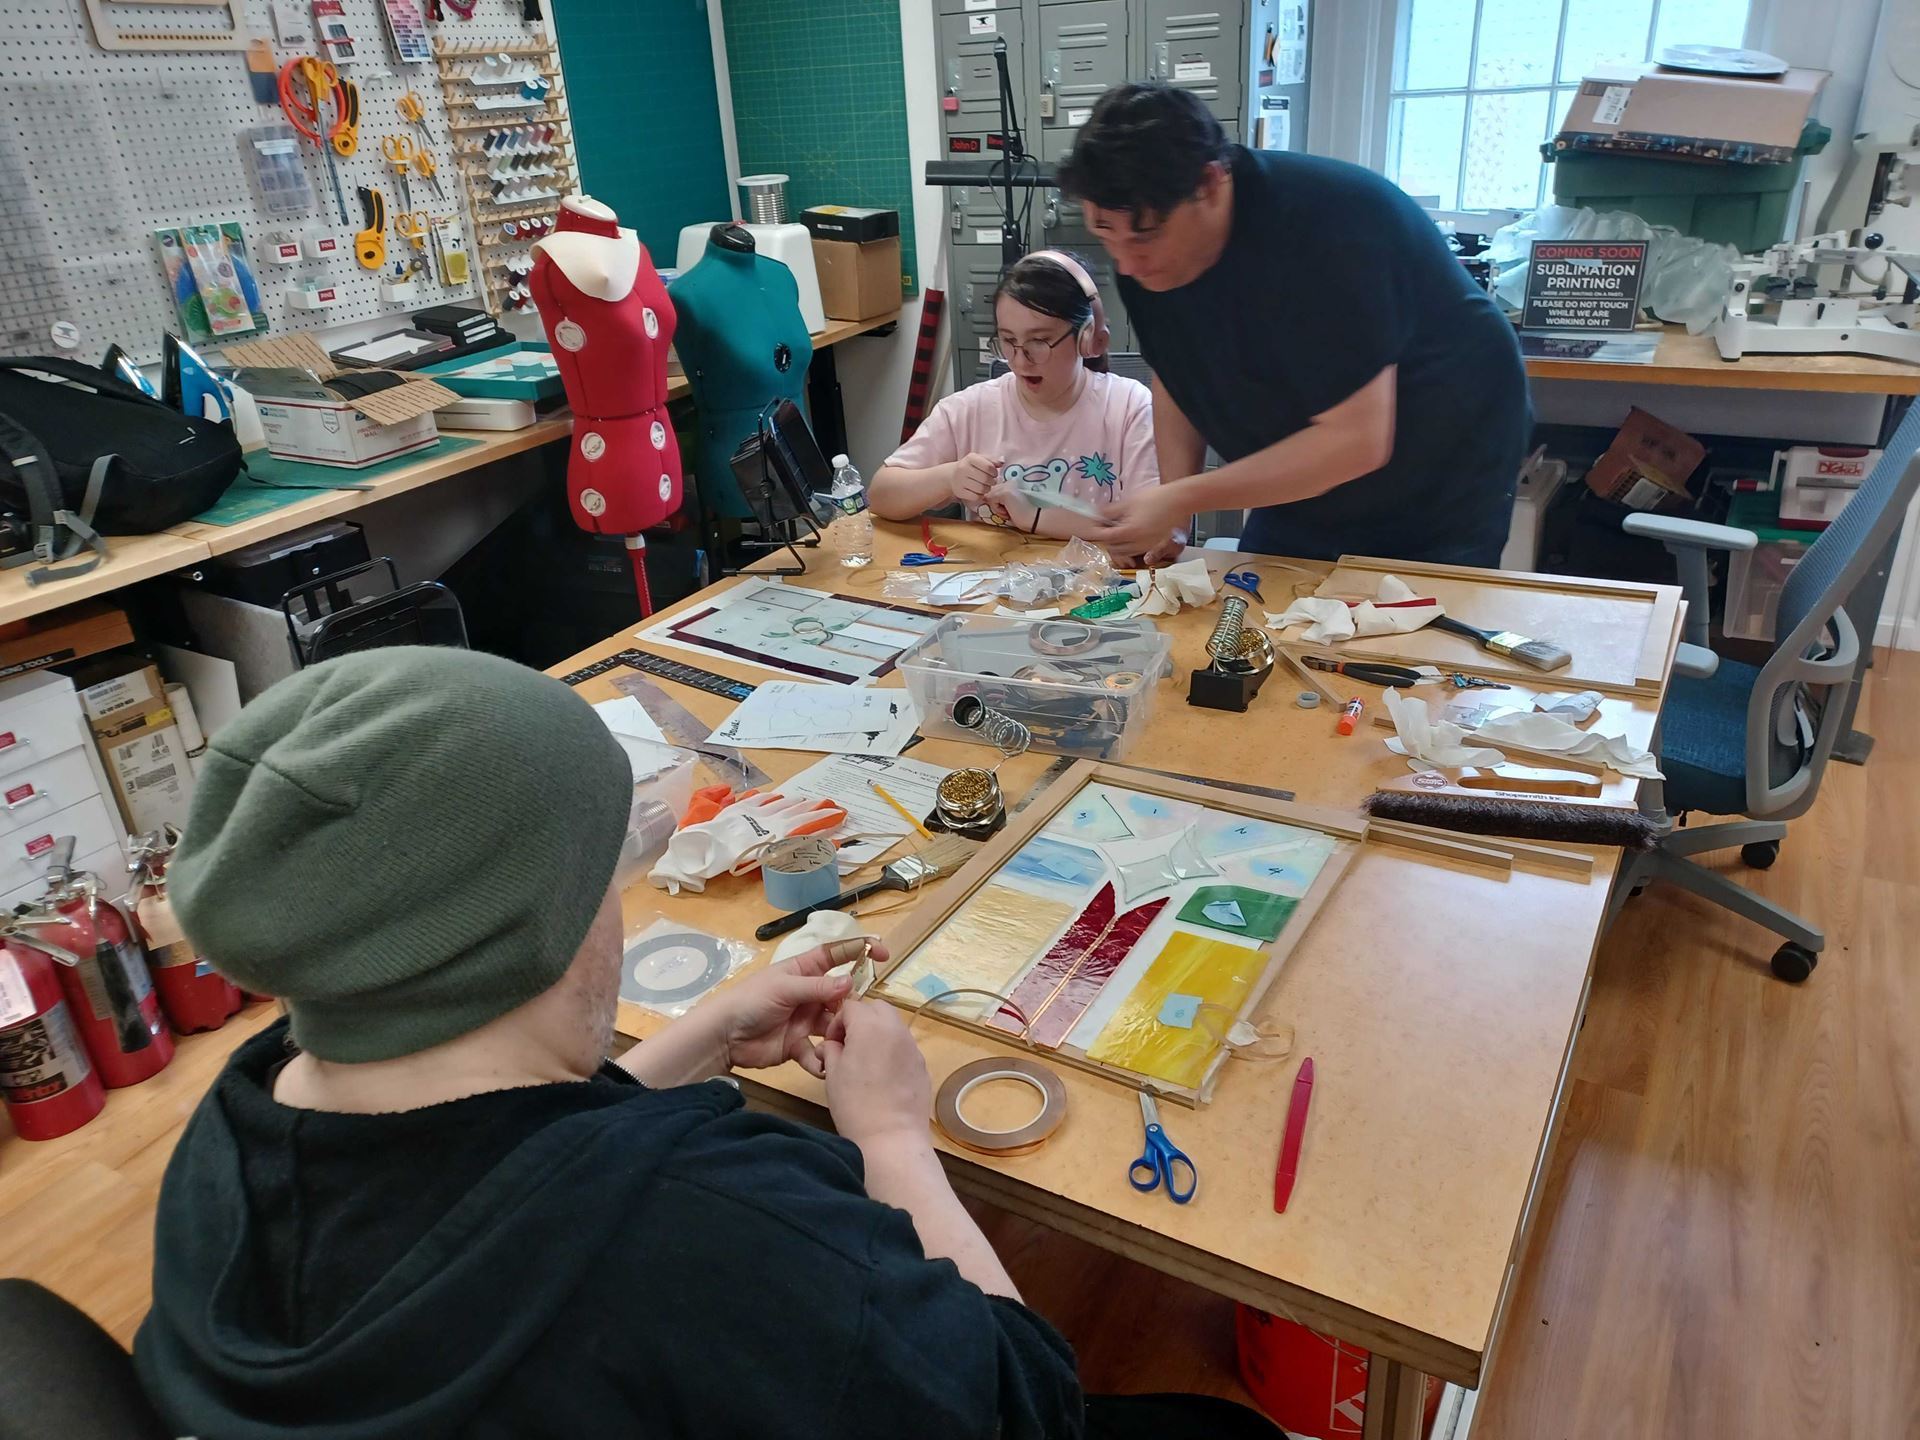
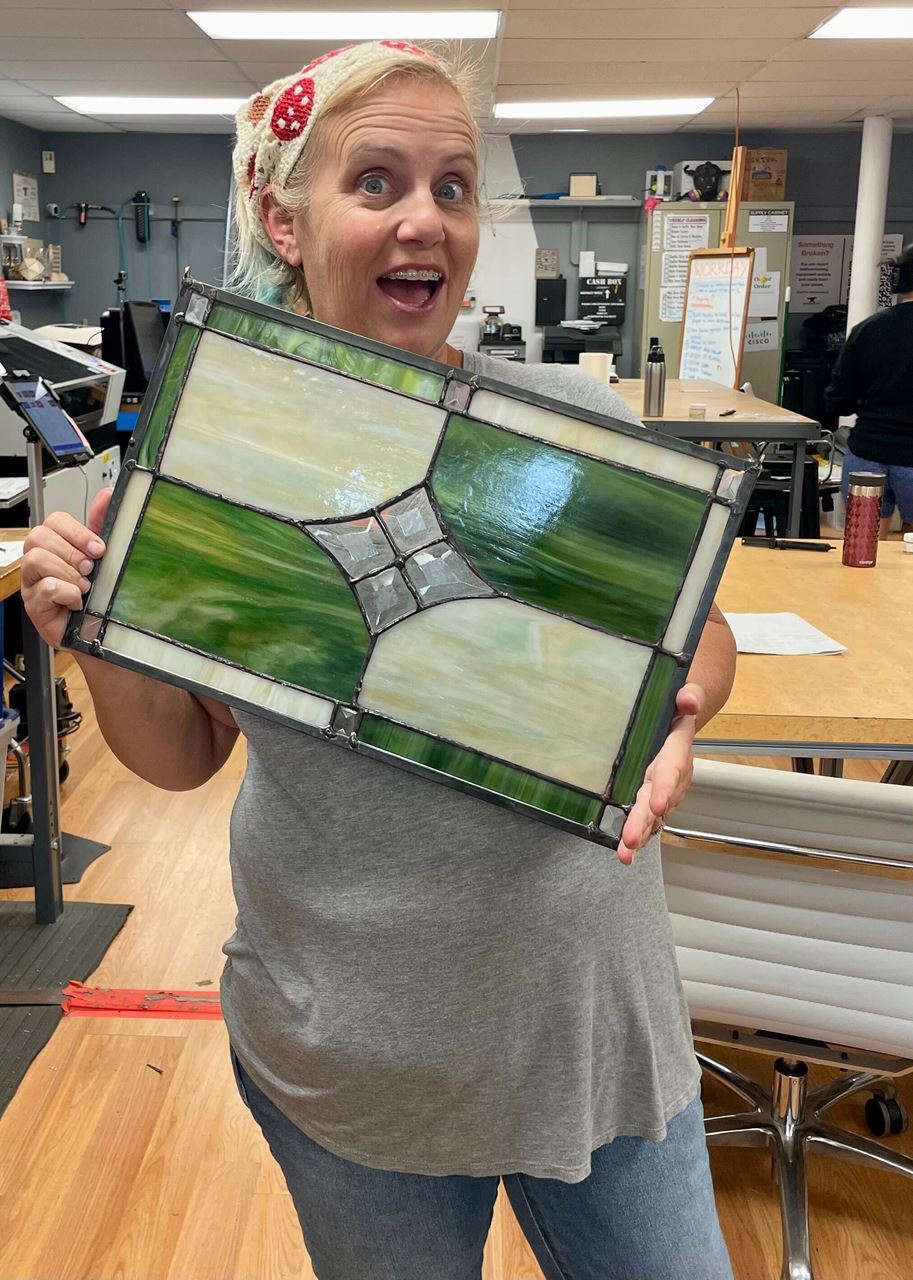
Stained Glass Pilot ClassLooks like a complete success! Can't wait to see future classes on the schedule. Thanks for setting this up, Jen Chu and Ken Fuentecilla! |
|
|
Red Tool Classes are an important step in your Maker journey!
|
|
|
MS-LLearn to Use the Cricut to make a Putz House - 9/2 Chess Night - 9/4, 9/11. 9/18, 9/25 Laser Cutter Intro - 9/13 Big Red CnC Operation - 9/13 How to Crochet a Coaster - for Absolute Beginners - 9/16 Red Tool Training for UV Printer - 9/18
Monthly Social - last Sunday of the month
|
|
MS-PBuild a Ceramic Mug or Stein - 9/9 Red Tool Woodworking Basics - 9/14 Red Tool Woodworking Adv - 9/17 Red Tool Metalworking Basics - 9/20
Monthly Social - second Sunday of the month
|
|
|
Makersmiths runs on volunteers! Consider teaching a class or holding a workshopcheck out the #class_planning_and_requests channel on Slack and join a meeting to get some help with your idea! |
|
|
check back on the website - new classes are added all the time
|
|
|
TOOL AUTHORIZATION GROUPSDean Williamson
Makersmiths has lots of cool and useful tools, machines, and equipment. Many of them require training or authorization before you can use the equipment. The training can be as simple as an orientation, to a more formal “red tool” class, to demonstrating proficiency to the tool steward. Such mandatory training helps ensure that all users understand how to use the equipment properly and safely, thus helping to keep the equipment running smoothly and minimize maintenance downtime as well as ensuring the safety of our members.
Below is a list of the tool groups which require training and for which we are tracking authorizations, or tool “sign-offs”. The tool steward(s) are listed next to each tool group, along with the method by which to get authorized to use the tools independently. Please contact the steward for more information about each tool. This list is not exhaustive of the tools available at Makersmiths and is updated regularly as we get new equipment or as needed.
The most current version of this list is posted on the Makersmiths wiki under “Tools, Materials & Training”. Please check out the list. You might discover a new tool that you didn’t realize Makersmiths had.
|
Tool Group
|
Steward(s)
|
Authorization Method
|
|
MS - New Member Orientation
|
Scott Newman
|
New Member Orientation Class
|
|
MS - 3D Printer FDM
|
Scott Silvers
|
Red Tool Class
|
|
MS-L - 3D Printer SLA
|
Michael James
|
Red Tool Class
|
|
MS-L - Big Red
|
Jonathan White
Brad Hess
|
Red Tool Class
|
|
MS-L - Lasercutter Advanced
|
John Dubelko
Jessee Maloney
|
Red Tool Class
|
|
MS-L - Lasercutter Basic
|
John Dubelko
Jesse Maloney
|
Red Tool Class
|
|
MS-L - Metal Shop
|
Brad Hess
|
Red Tool Class
|
|
MS-L - Router Table
|
Mike DeWan
|
Contact Steward
|
|
MS-L - Sawstop Advanced
|
Mike DeWan
|
Contact Steward
|
|
MS-L - Sewing Machines
|
Jessee Maloney
|
Contact Steward
|
|
MS-L - Tormach
|
Brad Hess
|
Contact Steward
|
|
MS-L - UV Printer
|
Melissa Kang
Mike Tomlin
|
Red Tool Class
|
|
MS-L - UV Printer Rotary
|
Melissa Kang
Mike Tomlin
|
Red Tool Class
|
|
MS-L - Vinyl Cutter - US Cutter
|
Dilip Patel
|
Red Tool Class
|
|
MS-L - Woodshop
|
Mike DeWan
|
Red Tool Class
|
|
MS-L - Woodturning
|
Bryan Boston
|
Red Tool Class
|
|
MS-P - 3D Printer SLA
|
Michael James
|
Red Tool Class
|
|
MS-P - Blacksmithing
|
Adam "Squirrl" McClintock
Jim Waldron
|
Red Tool Workshop
|
|
MS-P - Blast Cabinet
|
Scott Newman
|
Contact Steward
|
|
MS-P - EBF
|
Jim Waldron
Jonathan White
|
Red Tool Class and subsequent check-ride
|
|
MS-P - Gorton Mill
|
Dave Painter
|
Contact Steward
|
|
MS-P - Hydraulic Press
|
Adam "Squirrl" McClintock
|
Red Tool Class
|
|
MS-P - Kiln
|
Bo Wernick
|
Contact Steward
|
|
MS-P - Metal Advanced
|
Dave Painter
Jim Waldron
|
Contact Steward
|
|
MS-P - Metal Basic
|
Dave Painter
Jim Waldron
|
Red Tool Class
|
|
MS-P - Metal Lathe
|
Dave Painter
|
Contact Steward
|
|
MS-P - Plasma CNC
|
Jim Waldron
|
Contact Steward
|
|
MS-P - Plasma Cutter
|
Jim Waldron
|
Contact Steward for proficiency demonstration
|
|
MS-P - Powder Coating
|
Justin Cooper
|
Contact Steward
|
|
MS-P - Power Hammer
|
Adam "Squirrl" McClintock
|
Red Tool Class
|
|
MS-P - Sewing Machine
|
TBD
|
Contact Steward
|
|
MS-P - Surface Grinder
|
Dave Painter
|
Contact Steward
|
|
MS-P - Welding - Gas
|
Jim Waldron
|
Contact Steward for proficiency demonstration
|
|
MS-P - Welding - MIG
|
Jim Waldron
|
Contact Steward for proficiency demonstration
|
|
MS-P - Welding - Stick
|
Skip Smith
|
Contact Steward for proficiency demonstration
|
|
MS-P - Welding - TIG
|
Parker Brainard
|
Contact Steward for proficiency demonstration
|
|
MS-P - Woodshop Advanced
|
Dave Painter
|
Red Tool Class
|
|
MS-P - Woodshop Basic
|
Dave Painter
|
Red Tool Class
|
|
MS-P - Woodturning
|
Bryan Boston
|
Contact Steward
|
|
|
|
|
Board/Officer Name
|
Position
|
Term
|
|
Brad Hess
|
Board Member
|
2022-2025
|
|
Bev Murdock
|
Board Member/Secretary
|
2021-2024
|
|
Scott Silvers
|
Board Member
|
2023-2026
|
|
Jessee Maloney
|
Board Member
|
2022-2025
|
|
Jonathan White
|
Board Member/Chairperson
|
2023-2026
|
|
Scott Newman
|
Board Member
|
2021-2024
|
|
Mike DeWan
|
Board Member
|
2021-2024
|
|
Adam "Squirrl" McClintock
|
President
|
2022-2023
|
|
John Dubelko
|
Treasurer
|
2022-2024
|
|
|
|
|
Makersmiths Leesburg: 106 Royal St SW, Leesburg, VA 20175 Makersmiths Purcellville: 785 S. 20th St, Purcellville, VA 20132 Unsubscribe |
|
|
|