President's Message
John Dubelko
Greetings Members,
It is a busy summer for Makersmiths! Membership is up, classes are filled, and both locations are getting a lot of use. I want to thank everyone for their hard work and volunteer time making our organization shine. I especially want to highlight Jessee Maloney and Scott Newman for working on all the changes to membership. There were countless hours of updating websites, databases, literature, and more to get the new membership levels implemented. I also want to thank Mike Tomlin and the UV stewards for getting the UV printer operational and classes set up. Jessee Maloney, the new Leesburg facility chairperson, and her committee have given Leesburg a deep clean and a new look. We all appreciate the work Jessee and her committee have put into making MS-L shine.
At the time of this writing, the CDC has released more guidance on the pandemic. We are monitoring the situation. If required, we will implement new policies by posting signs on the entry doors and shared spaces. We will also send out emails and Slack messages.
As I mentioned last month, we are working on providing opportunities for members to give back. The #volunteers_needed channel on Slack will be used to communicate these small jobs. Remember, we are a community of volunteers. Please consider helping give back to our community makerspace. See you around and happy MAKING!
|
|
|
Chairman's Statement
Dave Painter
On Wednesday July 28 we held the (slightly Covid 19 delayed) annual meeting of the Board of Directors. In addition to the usual board business, we welcomed new board members Bev Murdock, Mike DeWan, and Scott Newman, and bid a grateful farewell to departing members Erin Werling, Michael James, and Brandon Bullis. When you next see these folks, please give them your hearty Thank You for their service. Without dedicated volunteers like them, Makersmiths could not exist.
I would be remiss if I did not also call attention to the incredible amount of work that Scott Newman, Jessee Maloney, Jon White, John Dubelko and other board members have done over the last month to ensure that all of our media is compliant with our new membership levels. As you doubtless remember, the board voted last month to eliminate associate memberships in favor of making all members full members, the only difference being the option to be a single member or a household member. There is still a lot of work to do in order to update our bylaws and standing rules but this is a normal maturation process that all organizations go through over time. We should count ourselves lucky that we have such dedicated people to perform this work!
While I’m on the subject of volunteers I need to remind everyone that a requirement of membership is that you contribute at least two hours of volunteer time each month. A perfect way to do this is to participate in the monthly work days at each location. Purcellville hosts a work day the first Saturday of each month, and this month Leesburg is hosting their work day on the Saturday after the member meeting. That means that both work days will be held on August 7 this month. We start at 9:00AM and are usually done around lunch time so put it in your calendar now and come join the fun!
|
Membership Update
Scott Newman
Big news! On June 30th, the Board of Directors voted some improvements to member benefits! As presented at the July Membership Meeting, the following changes are made effective August 1st :
-
Associate Memberships are now called Individual Memberships.
-
No change to monthly membership dues
-
Added: 24/7/365 building access (still requires New Member Orientation)
-
Expanded: Each Individual Member may bring up to 2 guests
-
Lowered: The Tool Usage Rate has been lowered to match the former “Full Member” rate
-
Full Memberships are now called Household Memberships.
-
No change to monthly membership dues
-
Expanded: Confirmation that the Primary Household Member (PHM) may add any Additional Household Members (AHM), eliminating the “immediate family relationship” requirement
-
Expanded: Household Memberships have up to 1 additional vote at Membership Meetings
-
Simplified: Household Memberships no longer require a Board vote
Please see the minutes from the Jul 28, 2021 Board of Directors Meeting for details. The Wiki will be updated on Aug 1, 2021 to reflect these changes. If you have any questions, please contact the Membership Chair at Scott.Newman@makersmiths.org. |
Scheduling Committee News
At Makersmiths, we offer classes, courses, and events for our members and the general public (i.e. guests of Makersmiths). Some of the classes are red tool trainings providing members with the knowledge and skills they need to know to operate certain machinery and tools. It is important that red tool trainers send a request to the scheduling committee to reserve the room or particular machines so people can register. This also gets the class shown on the Makersmiths’ event calendar. Members need to know that the room or machine is booked for a particular date and time. Red tool instructors must also check off participants who complete trainings so that member records reflect that the trainings were successfully completed. Red tool trainers who need the Wild Apricot app for checking off participants, please contact John.Dubelko@makersmiths.org for details.
As a reminder for all instructors, please make your requests 14 days in advance. This gives the committee time to complete their tasks, including creating and announcing the class, course or event in a timely fashion in order for members to have a chance to register. Contact diane.painter@makersmiths.org to ask that your reservations be made if this is a repeat class, course, or event.
Do you have a desire to be an instructor or event leader? New classes, courses, or events should be made by filling out a request form. To do that, please log into www.makersmiths.org as a member, go to Members Only Content. From Important Information, choose Events & Classes Requirements. Download the Organizing & Running a Makersmiths Class PDF. When ready to plan a class, workshop or event, click on the Course, Class or Event Request Form red button and fill out the form. If you have any questions, please contact me at diane.painter@makersmiths.org. |
|
|
|
|
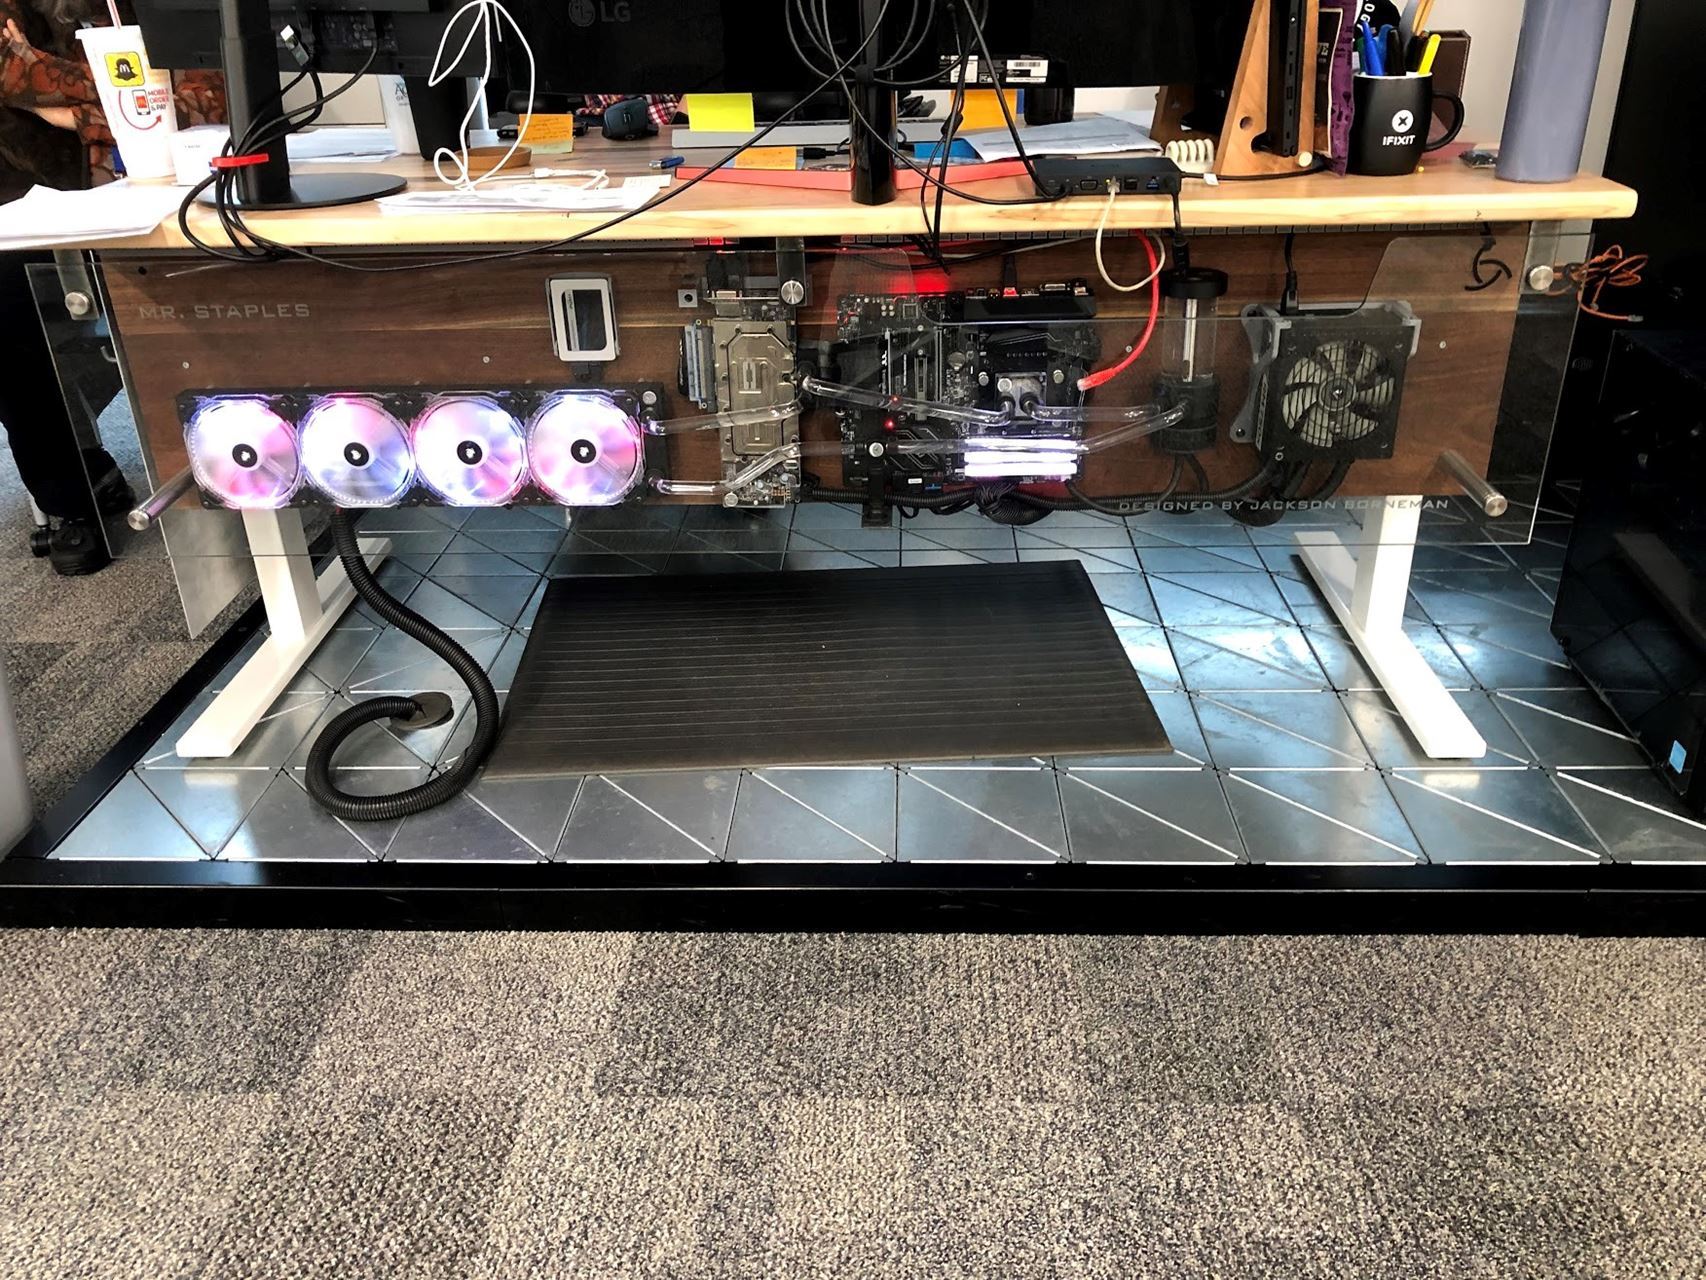
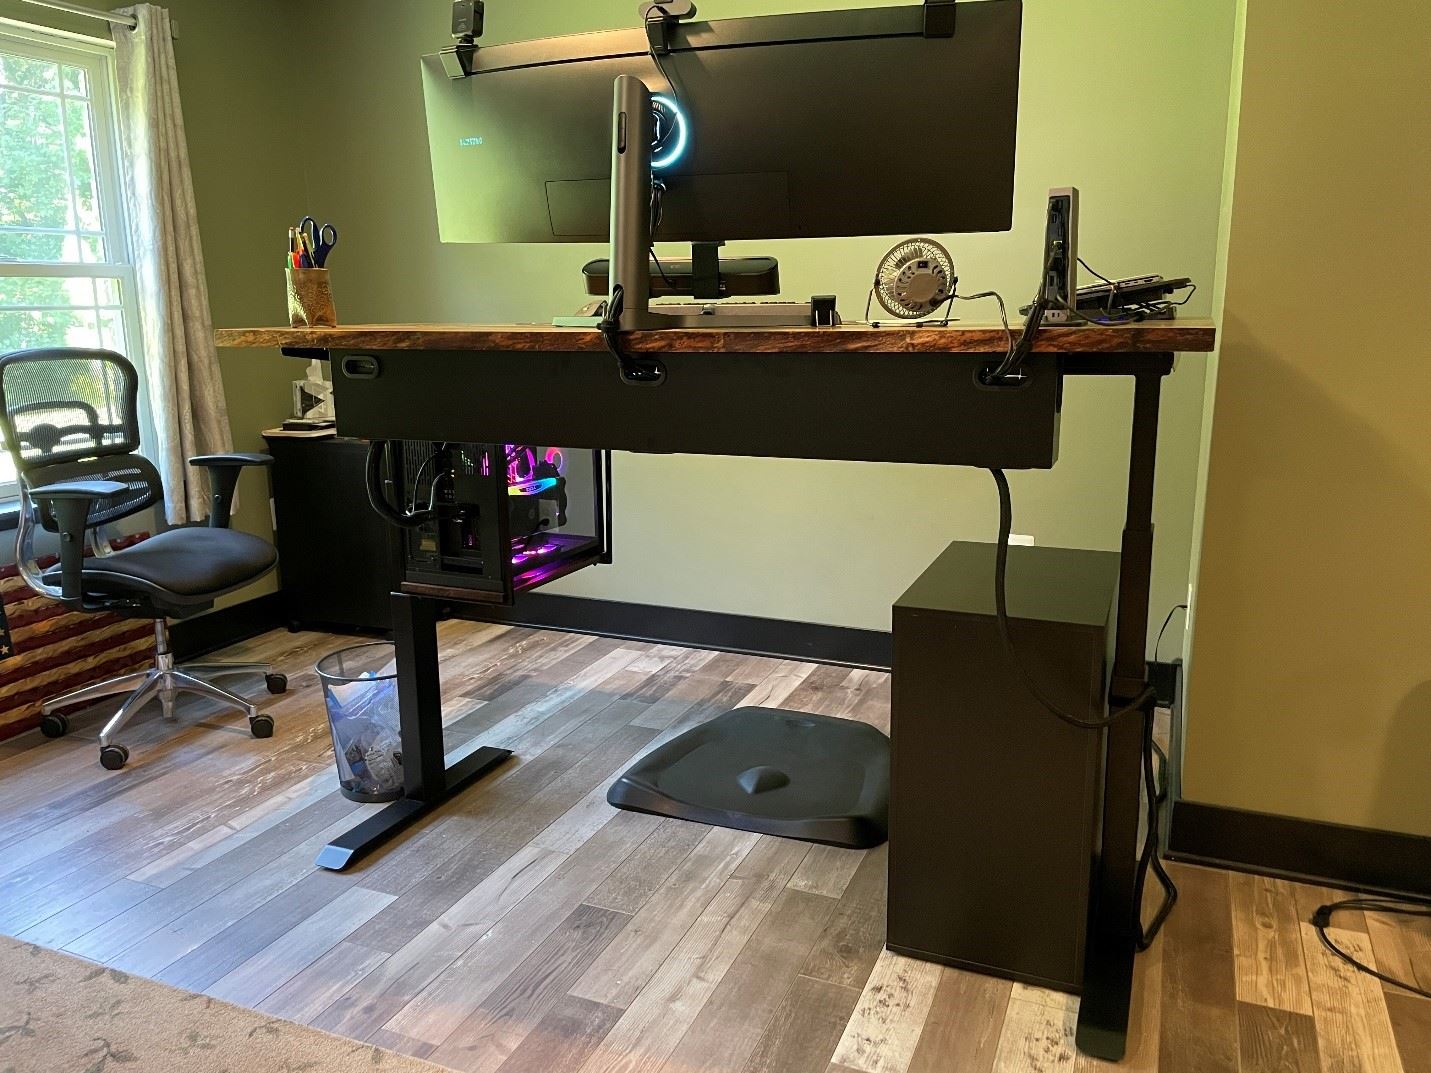
Building a Live Edge Standing Desk
While my son was in high school, he built a standing desk as a project at Monroe for his computer teacher. It featured a full functioning computer built into the front of the desk in exploded view as a demonstration of all the components. I assisted on the woodworking and the rest was amazingly all him. I was hooked on a full sit/stand desk but I never seemed to find the time to build my own. |
|
|
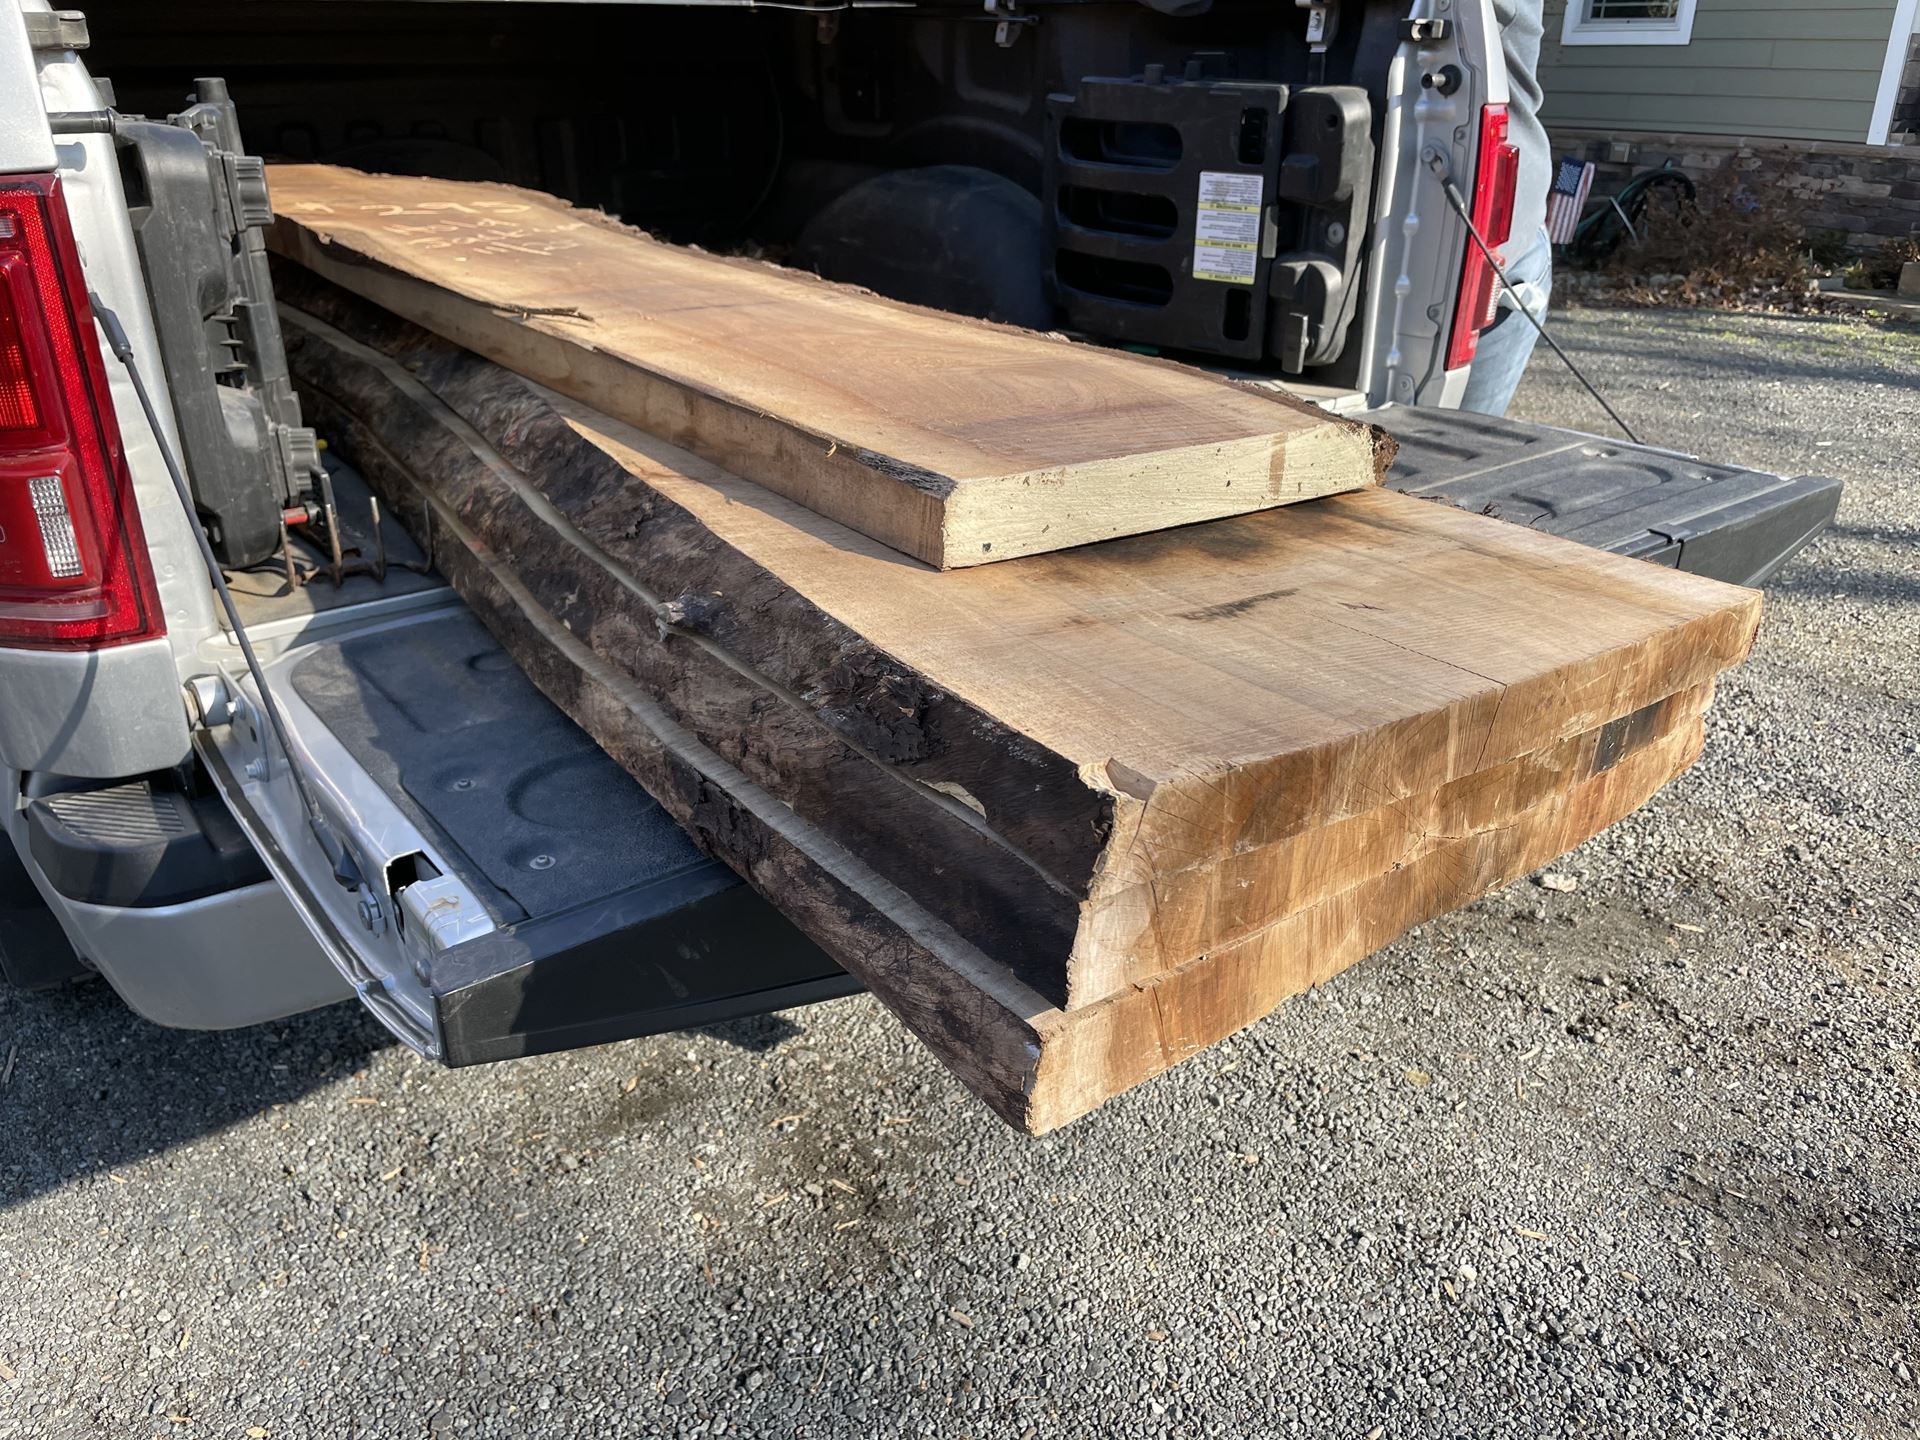
Working from home so much over the last year we made it a priority. One of the many reasons we joined Makersmiths was to take advantage of the larger woodworking equipment in Purcellville and this was going to be our project worthy of the planer, sander, and CNC. Many people have lots of different hobbies. A side benefit for me is when a project creates the need to procure a new tool, hence to justifying said tool. In this case, we upgraded from a basic Harbor Freight biscuit joiner to a Festool Domino along with a Festool track saw to handle slicing up the slabs.
We purchased three slabs of English walnut and one slab of black walnut from Local Wood. The three English walnut slabs came sequentially from the same tree and included a slab right through the vertical center of the tree including the pith My son Jackson is building his matching desk as a river table with black walnut on one side and English walnut on the other. (I’m sure he will be posting pictures soon once his is completed.) In my case I was excited to get a board with fairly straight live edges, but unfortunately that can also lead to the slabs developing a bad twist. This happened to my three English walnut slabs which were stacked together and twisted together. |
|
|
The workaround is to slice the boards up roughly down the center or as needed to reduce the amount of variance per board and then flatten them. The slabs were 2” thick and I only needed my desk between 1.25” and 1.5” thick. I also already planned to split at least one board so I could make my two front and back live edge boards so it was just a matter of splitting all of them with the track saw. |
|
|
|
|
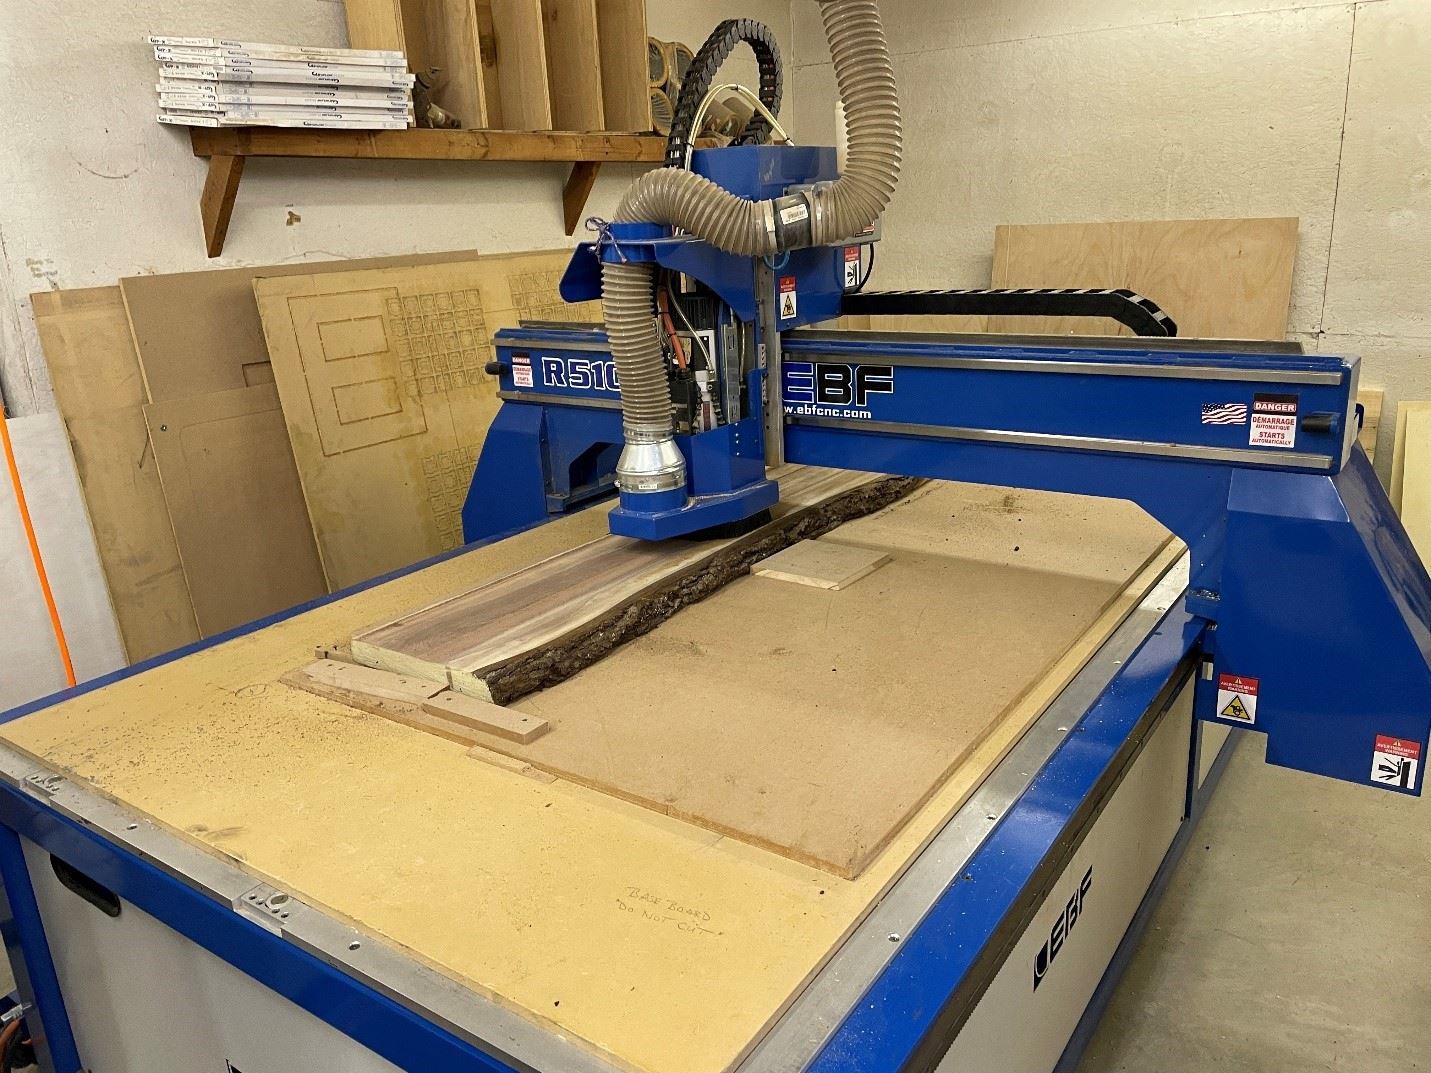
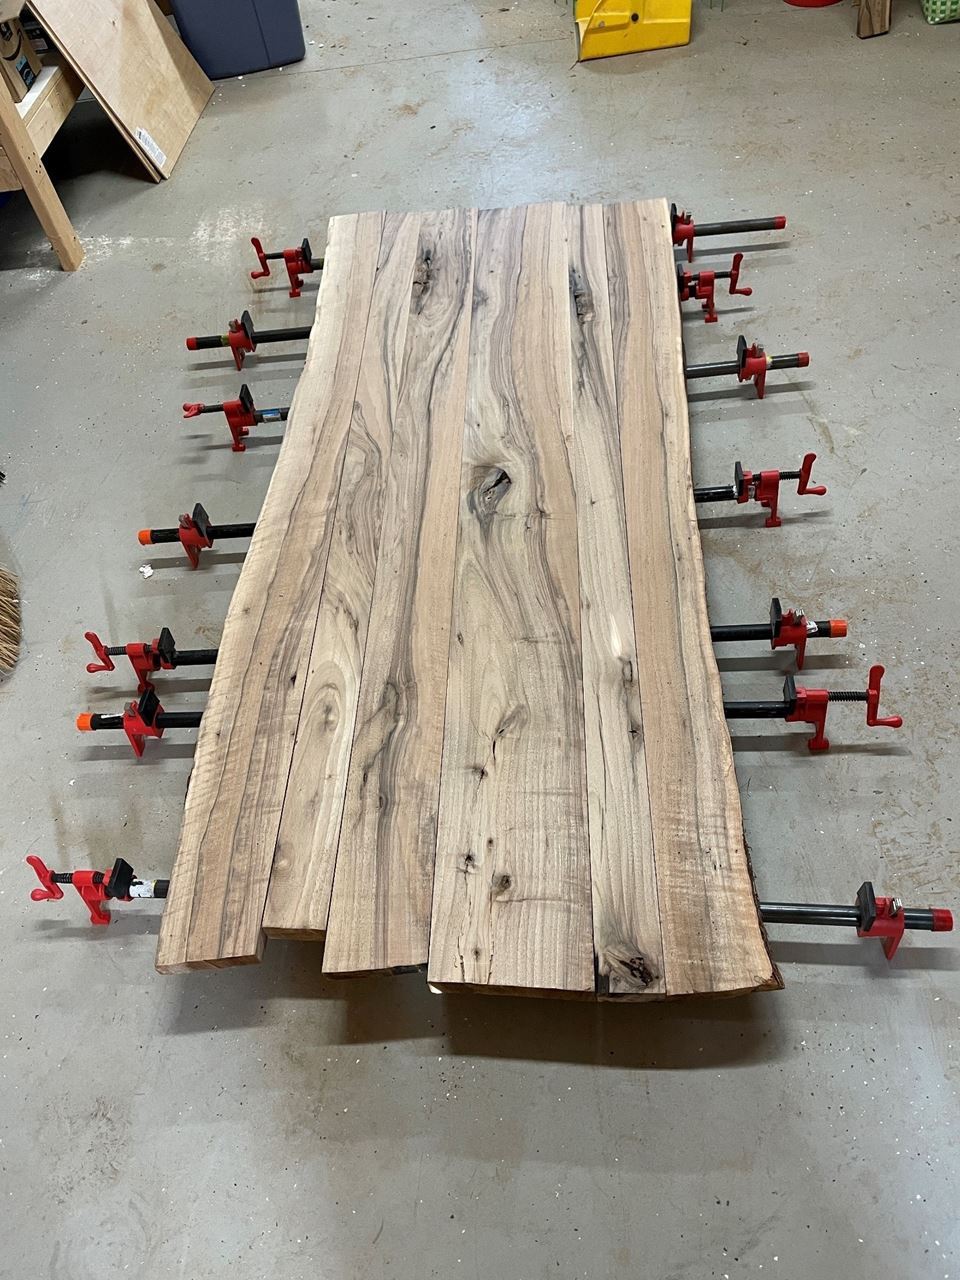
The blue EBFCNC in MS-P did an amazing job flattening our slabs. We followed up using the track saw again against the now flat reference side to clean up the edges and the planer to adjust the thickness until all the twist was gone. We joined the boards together using the Domino. The Domino was a big upgrade from the biscuits for alignment and strength and I really appreciated the solid wood dominos vs. the compressed biscuits when doing the glue up. For long edges with the biscuits, we were always in a race against time for the biscuits to expand once they got wet with the glue. Not an issue with the dominos. Here are the boards laid out before cutting the mortises with the Domino. |
|
|
After we joined the boards, we then addressed the knots and bug holes throughout the outer edges of the slabs. We poured black resin into all the holes with multiple pours. Surprisingly some holes were deep resin eventually found their way out to the live edge. We also sealed the underside of the knots to prevent the resin from dripping out the back side. |
|
|
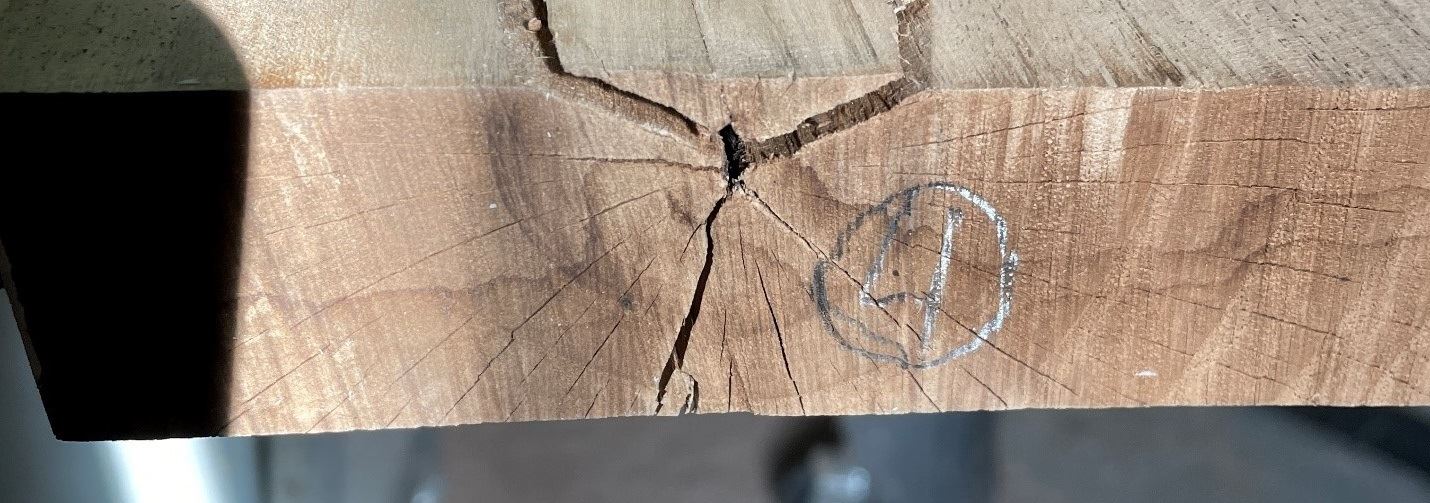
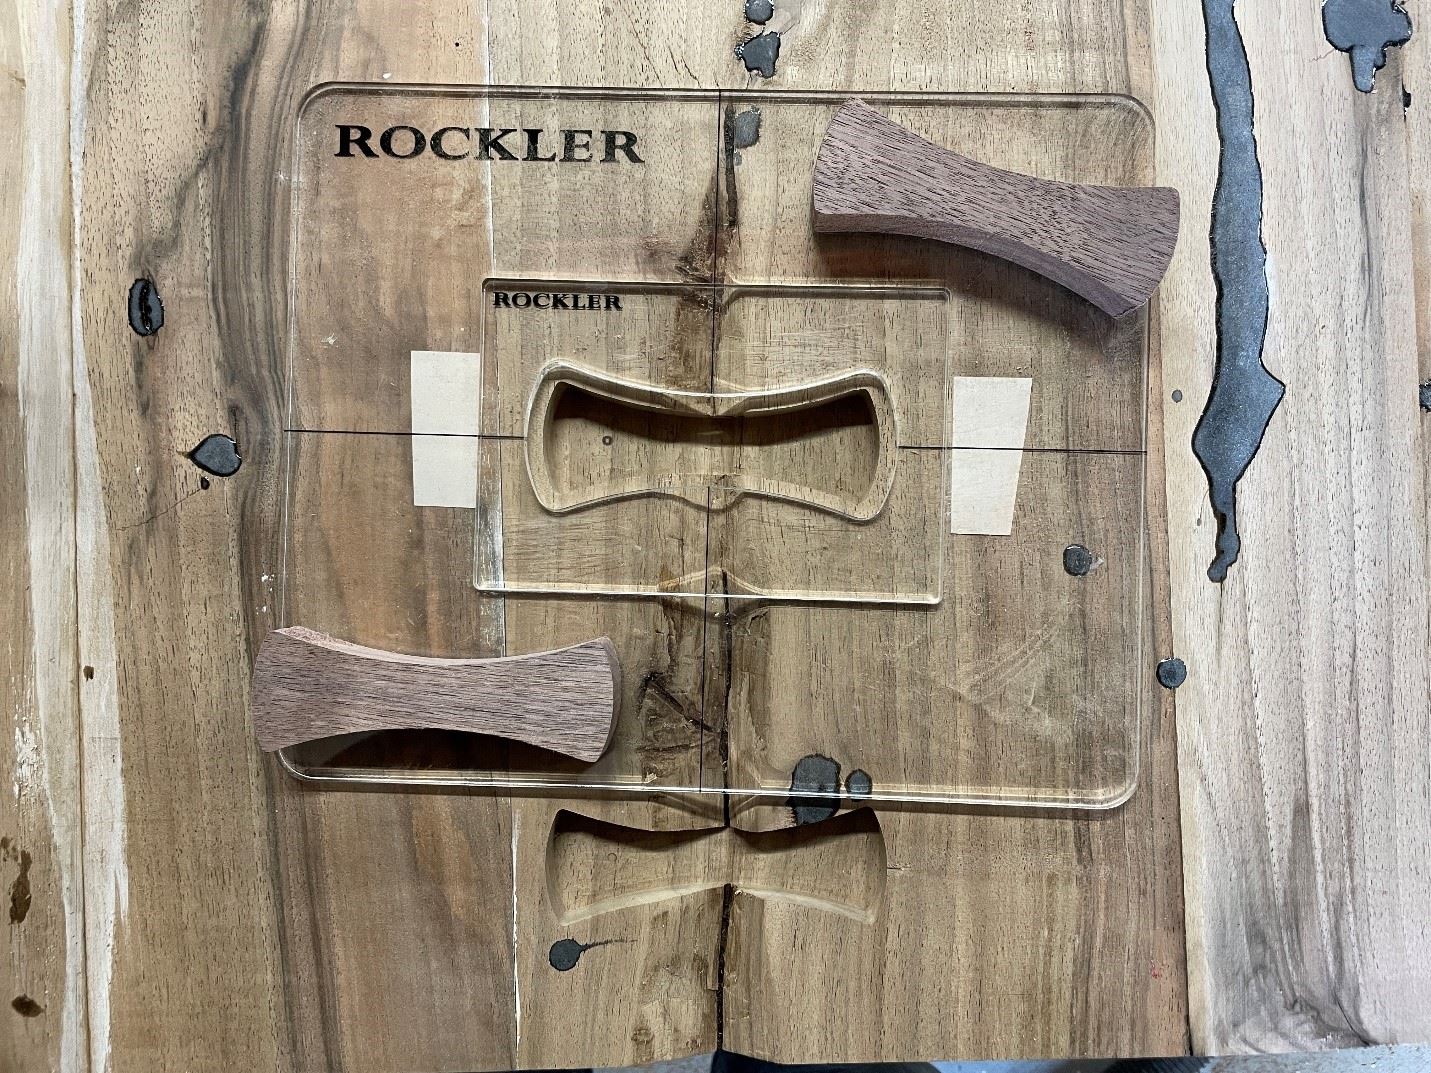
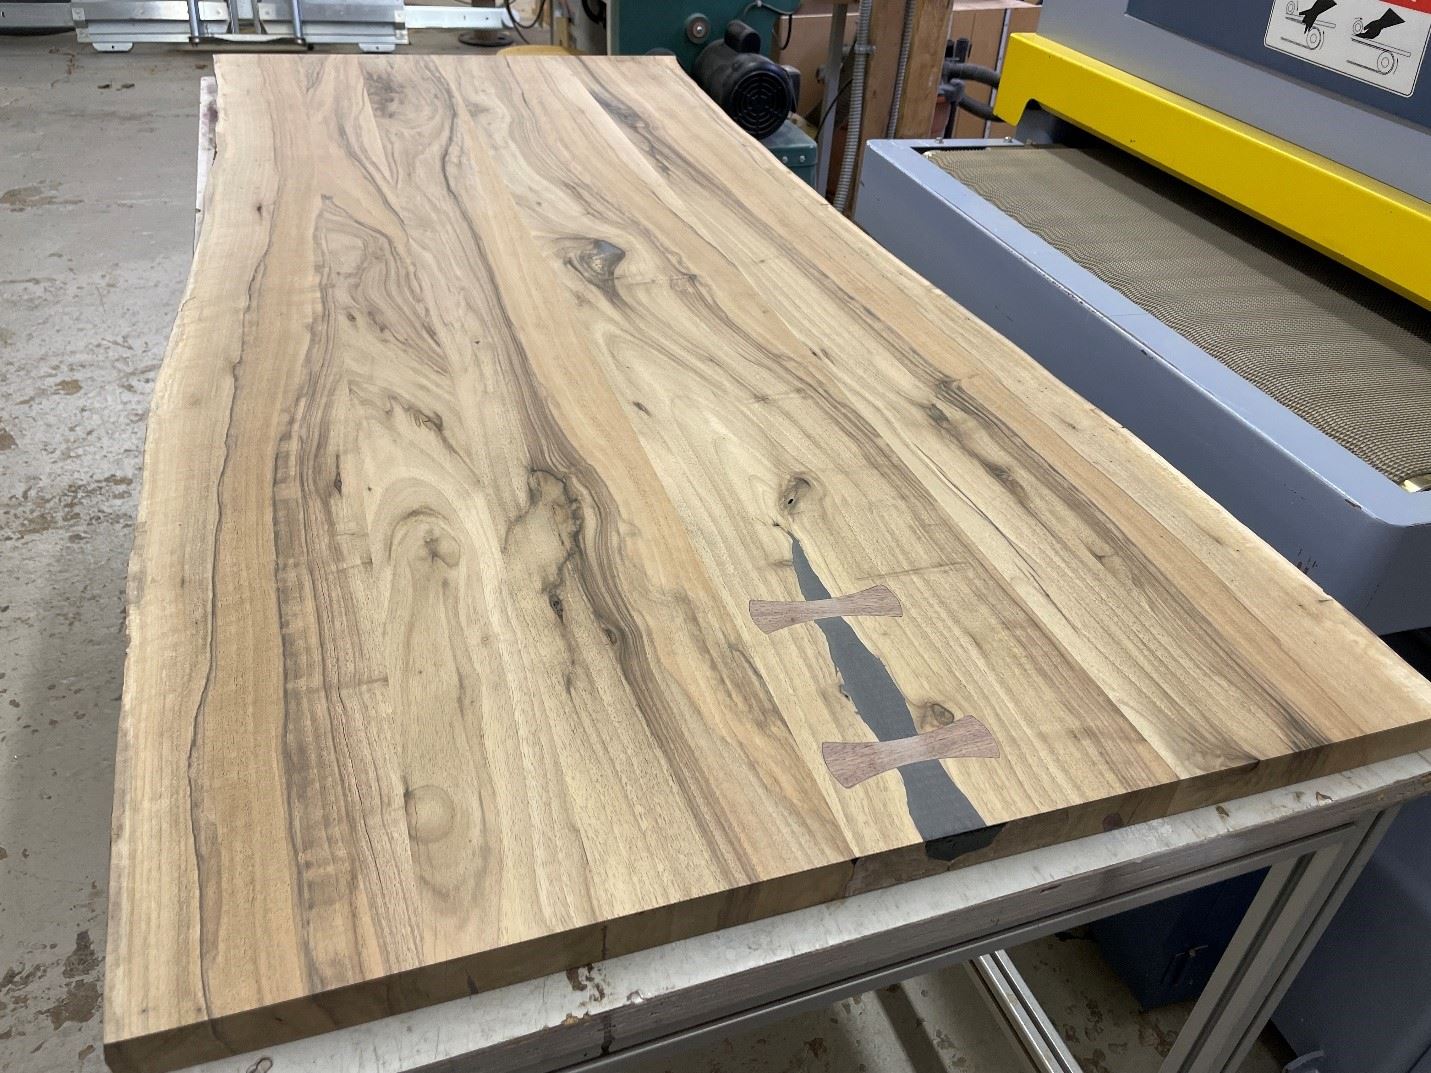
There were some challenging wood splits. The worst was at the pith where a wedge of the wood just flapped. I decided to chisel it out and use two bowties from black walnut scrap along with black resin to fill in the rest and provide a flat surface. This was my first time doing an inlay and I decided to use a template from Rockler instead. Lessons learned the Rockler templates are intended for inlays that are only 1/8” thick. To make a 3/4” thick tenon I replaced the drill bit from the kit with a 2” Amana router bit which let me go deeper. My other lesson learned was that I should have used more two-sided tape to hold the template in place. With the depth I was doing and the thinness of the router bit I had to do multiple passes and the tape adhesion wasn't quite strong enough. |
|
|
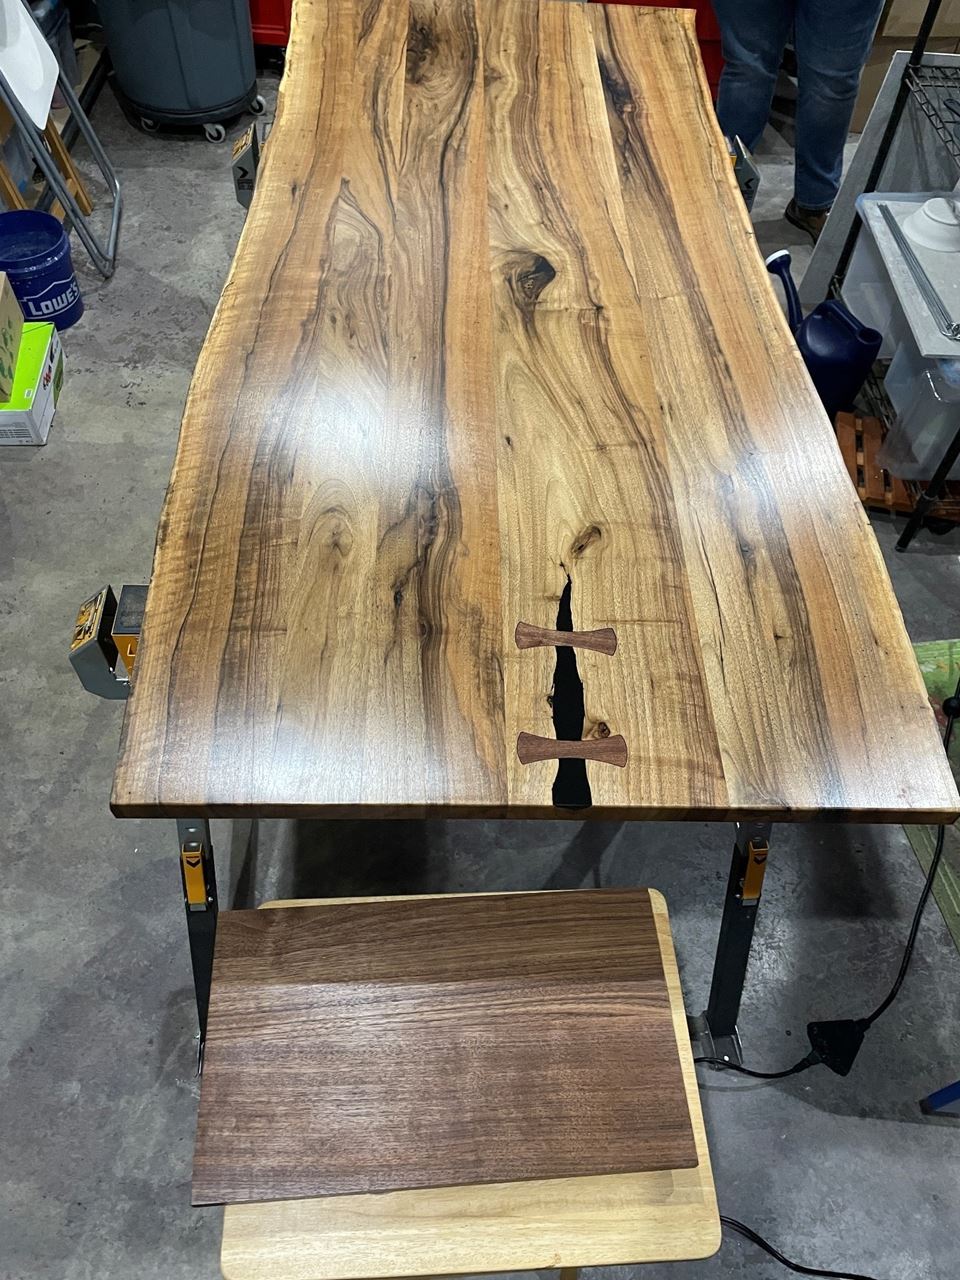
Once we had everything filled in we used the MS-P 37”x75” belt sander. I purchased my own set of belts online so I could take it to higher grits with all the resin pours. After both sides were sanded with the belt I hand sanded the live edges to reduce the roughness and remove any loose pieces to keep the live edge look and the bug trails. I used a 1/8” roundover bit on the left and right ends with a straight edge clamped to keep the router from making the turn down the live edge. |
|
|
|
|
For a full parts list of all the hardware and more details on the final finish check out my update on the #whatcha_make_today (Tuesday July 13) slack channel for more pictures and links
|
|
|
|
|
~ Chris Borneman, photos and text
Chris and his family joined Makersmiths a few years ago when his older son was interested in learning everything about manufacturing and processes, from 3D printing, to CNC, to metalworking, arduino, Pi, etc. Athough they have their own 3D printer and woodshop of common tools, they love the big gear in MS-P as well as access to the laser, vinyl cutter, and now the UV printer at MS-L.
|
|
|
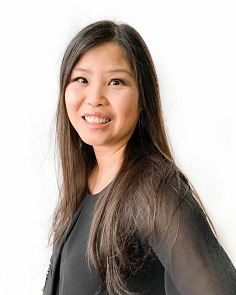
Interview with an Instructor - Melissa Kang
|
|
|
How did you find and join Makersmiths?
I heard about Makersmiths through another entrepreneur in a Facebook group. I mentioned to her that I was looking to engrave on the bamboo lids on the glass containers that I sell and she told me to check out Makersmiths. I scheduled a tour with Scott and loved everything about Makersmiths...so I joined right away!
What made you decide to be an instructor?
I had been using the rotary tool on the laser to do tumblers and when I shared pics of them on the laser Slack channel, I got some positive responses from members who were interested in learning more about it. John Dubelko asked if I would be interested in teaching the rotary class, so I was more than happy to help out and contribute my knowledge. I am now also one of the instructors for the UV Printer and it's exciting to be learning a new tool and be able to share it with others!!
|
|
How long have you been an instructor?
Just a couple of months and have co-taught two rotary classes with another instructor
How hard was it to become an instructor?
Not difficult at all. For the rotary class, I shadowed one of the instructors initially. Once you learn how to use the tool, you can speak to it and all the information you need is in the class slide
|
|
|
|
|
We can always use more instructors at Makersmiths - this opens up more classes for everyone to develop new skills! |
|
|
Heard in the hallways...
Resin printing is the new hot topic in the 3D printing rooms. Downstairs in a dark cubby off the cosplay area, we have an Elegoo Mars Resin 3D printer. Elegoo was wonderful and donated one of their Mars printers to our space. Resin printing, or SLA (Stereolithography) works by blasting a UV Sensitive Resin with UV light. A cell phone screen is used to block the areas that you don't want to print.
The great part is that it is VERY detailed. Look at some of Jessee's creations in the #what-did-you-make-today channel and you can see every rivet and belt buckle. Make sure you get to one of Tyler James' Red Tool classes over the next couple weeks before he returns to GMU for the fall. . ~ Michael James |
|
|
|
~ Jessee Maloney, photo/maker |
|
|
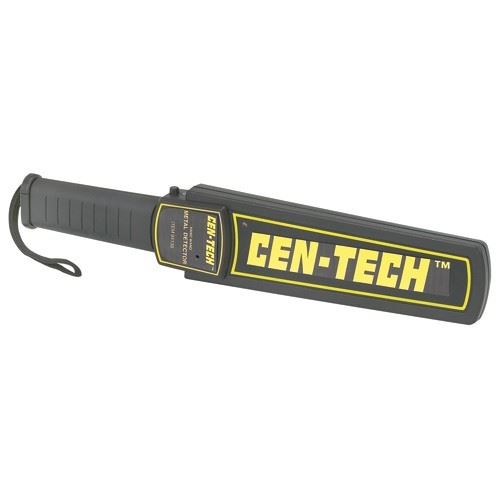
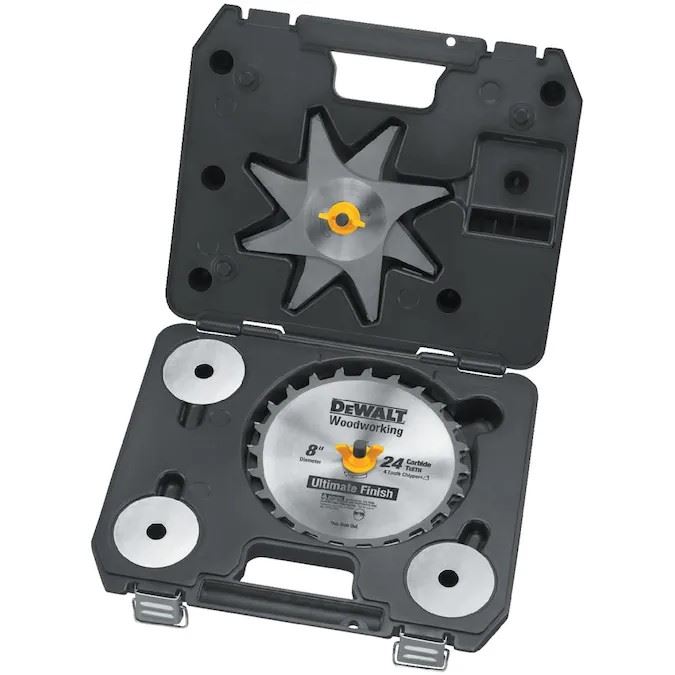
New Additions in the Woodshop at MS-L
|
|
|
A metal detector is available in the Leesburg wood shop. Please use this before making a cut on the Saw Stop, planer, or joiner. Hidden metal in wood stock will cause the brake to activate while passing metal through the planer or joiner will ruin the blades. Running the metal detector wand over your stock is quick and easy. You will find the metal detector hanging on the wall next to the SawStop.
|
|
|
DADO SET
We have an 8” dado blade set and brake cartridge for the saw stop. Use this to make grooves, tenons, lap joints, rabbets, and many other joints. The set can be configured to cut channels up to 13/16. Please contact a shop steward for instructions on how to change the saw stop brake cartridge and how to stack the dado blades and chippers.
|
|
|
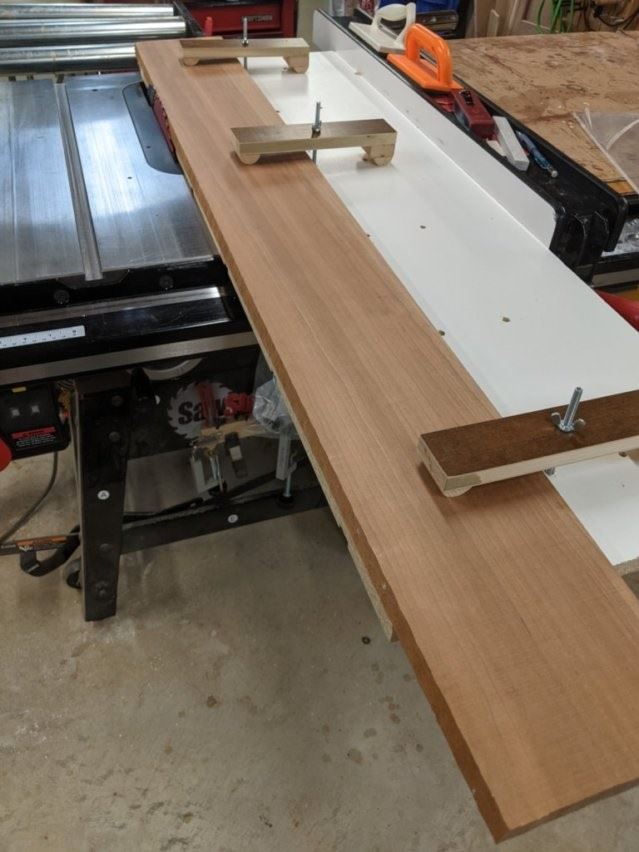
QUICK, EASY and SAFE- JOINTED EDGE ON ROUGH LUMBER
You cannot rip a piece of wood through the table saw unless it has a straight edge to set against the fence. The quickest way to safely produce a straight edge is by using a jig (Photo Below). Clamp your stock (the board on the left) to the jig and let the portion of the rough wood edge that is to be removed hang over the edge of the jig. Use the straight edge of the jig (on the right) to register against the table saw fence. Do not let the saw cut the jig base. In one pass you get a straight edge. This jig is available in the Leesburg wood shop. If you need additional instructions on how to use this contact a shop steward for help. |
|
|
|
|
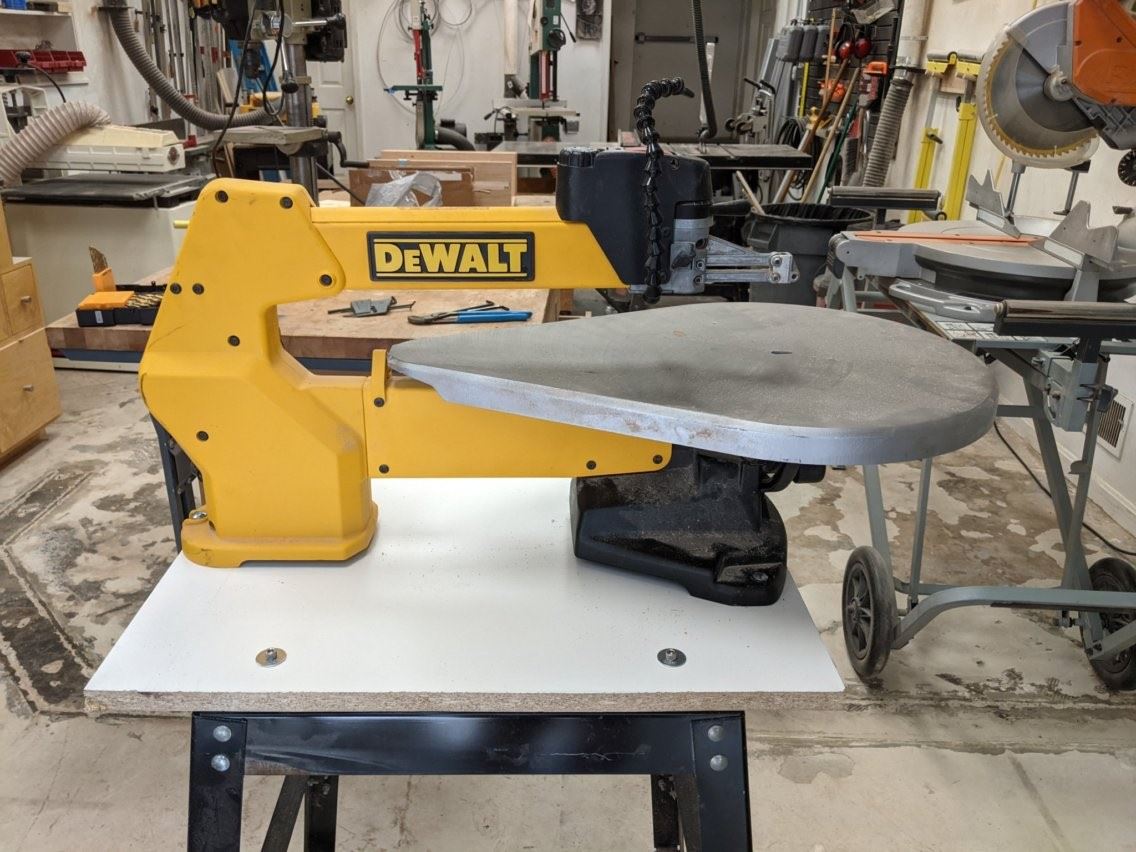
A member has co-located his scroll saw in Leesburg. We are
in the process of setting this up and making it ready for member use.
|
|
|
Our old drill press has been replaced. This Delta machine has a larger capacity and a variable speed control that doesn’t require manually changing the drive belt to change the speed. Please continue to use a spoil board to prevent drilling into the table.
|
|
|
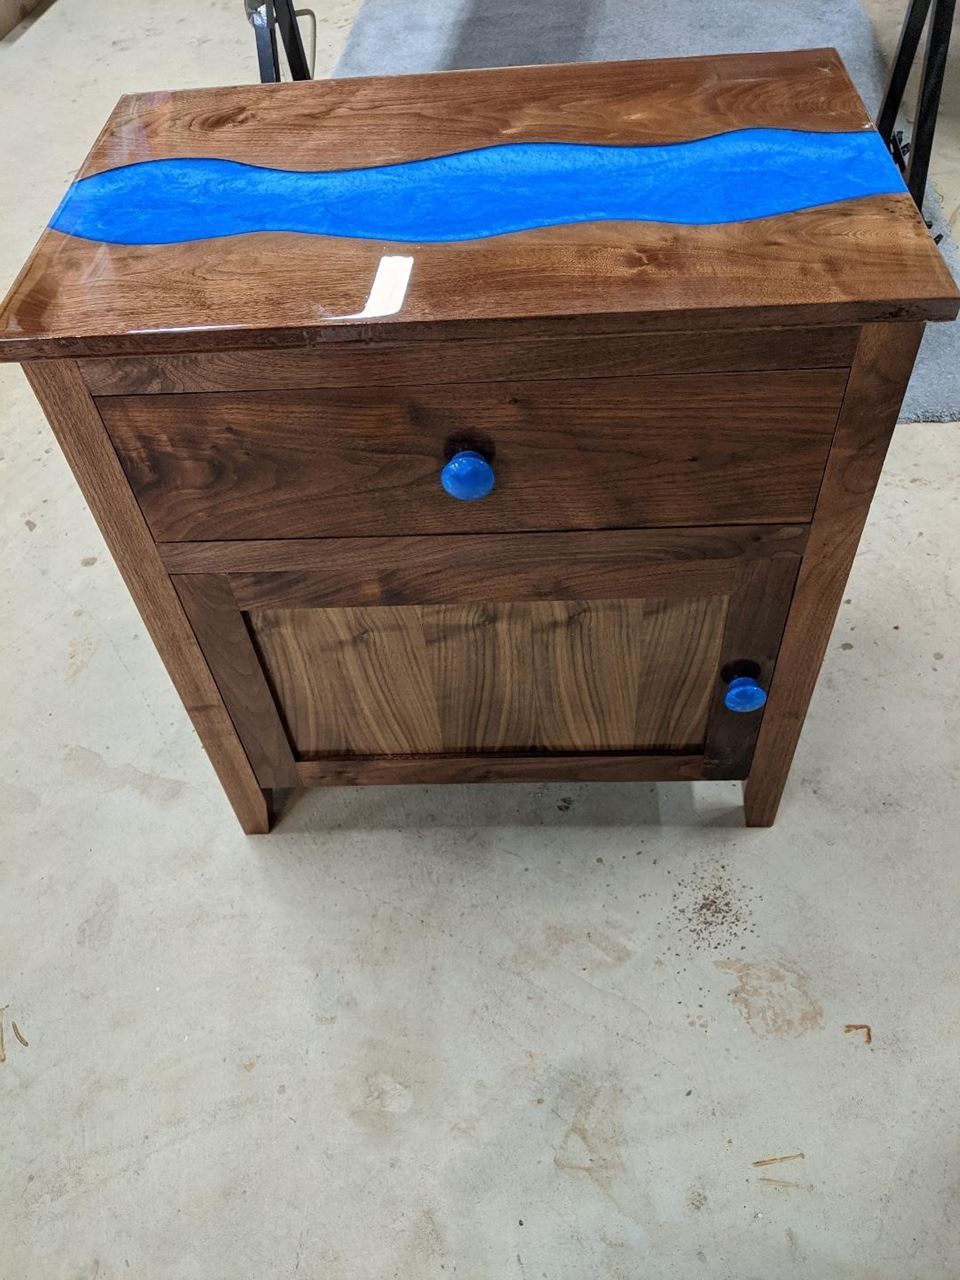
Get to the wood shop and make furniture instead of spending
a fortune at a furniture retailer. Below is a bedside cabinet from walnut with
a resin river top. All of the tools to make great furniture are available in
one of our wood shops. ~ Mike Dewan |
|
|
Announcements
** Makersmiths is looking to organize fun hackathon-like events to make our community livelier and more inclusive. We need champions that could make this idea come true. If you’re excited and interested please get in touch with Julius either via slack or email
** Ceramics classes are a big hit and could use some additional instructors! Check out the #ceramics channel on slack and contact Jason Hill for more information
** The Custom Framing Shop committee is looking for a new chairperson or co-chair to assist in getting the custom framing program online. Knowledge of custom framing is a bonus, but not required if you are willing to learn! Contact Anthony Lesink for details.
|
|
|
What's New?
Woodturning classes are starting up Aug 2 Monday 6-9. Continued Classes will remain in Monday 6-9 slot with the beginning classes being Woodturning Red tool class. Project classes to follow. Contact Bryan Boston for more information. Additional days for projects will become available with members becoming more involved. Please log in to channel #woodturning for more announcements and discussions.
|
|
|
Makersmiths Leesburg: 106 Royal St SW, Leesburg, VA 20175 Makersmiths Purcellville: 785 S. 20th St, Purcellville, VA 20132 Unsubscribe |
|
|
|